MICR (Magnetic Ink Character Recognition) allows recognition of the special text written with the magnetic ink fonts, such as bank cheques by using preconfigured zones.
The recognition is done by creating (drawing) a zone on the target text. The module will run the recognition over the printed text and return it inside the zone variables as result.
By default the module creates automatically variables for every zone inserted with the naming convention, for every zone, of:
- MICR_ZONEXX
Where XX is the incremental number of the zone starting from 0. The variable name can be further customized inside the zone setting.
When processing multipage documents every variable will be extracted on every page and the variable name will be suffixed with _PY which stands for Page Y where Y is the number of the page, example:
MICR_ZONE01_P1
MICR_ZONE02_P2
The variable name without the _PY will still exists and containing the result on the last page of the document.
The module creates custom variables during processing. Check the Variables list for more details.
The left hand side menu shows the available settings section. Settings are displayed according the selected section.
General
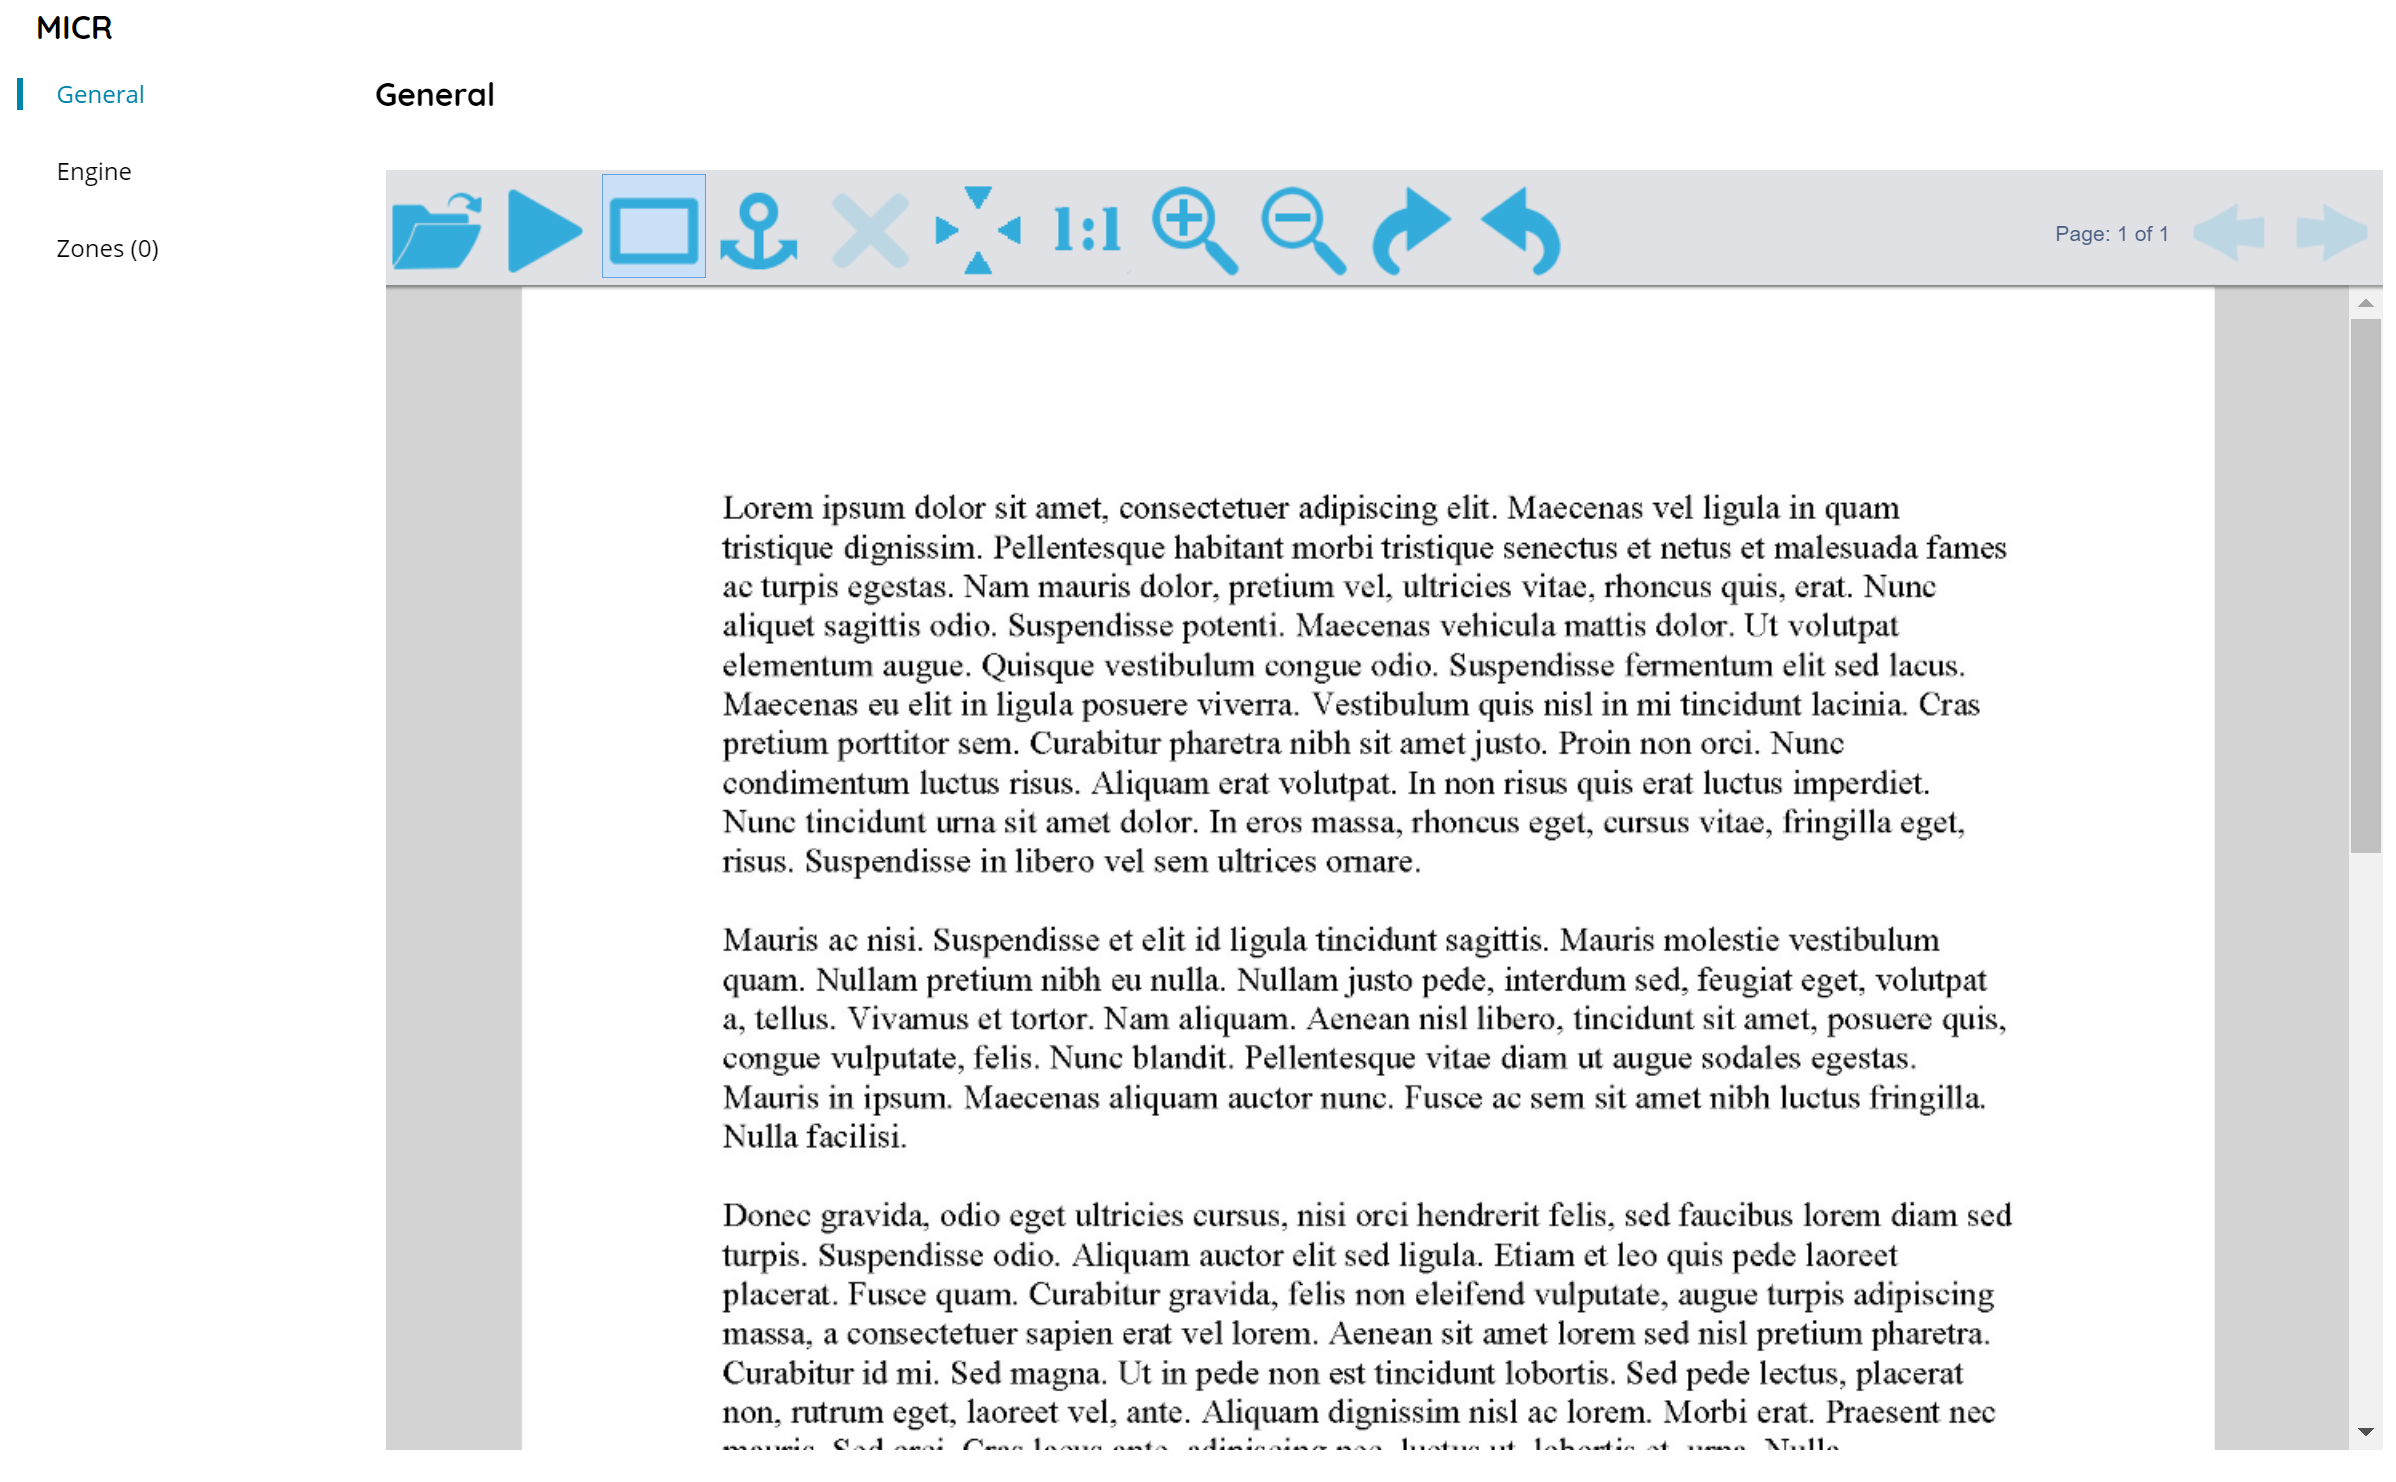
This section shows a sample built-in document preview, moreover it allows to load real document samples in order to draw and create the target recognition zones.
On the top bar document controls are available:
• Load Image
Browse to open and load (by uploading to the server) a sample document to render on the preview pane.
The sample document will be saved inside the module settings and reopened the next time the module is configured by using the document file uploaded to the Scanshare data folder.
If the document file has been removed or the Workflow has been exported on a new machine where the sample document file is not existing the preview will render with a big red cross X, however zones are existing and fully working unless they are modified.
• Perform test recognition on inserted zones
When pressing this button, the application will start recognition all configured zones. When all Zones are read, a notification message will be prompted and the zones values will be updated in the zones list in order to check the recognition test results.
• Draw recognize area
With this option, you can manually select an area where the application should read the Zone from. When a Zone is detected, it will automatically be read and show up in the zones menu with the recognition result.
• Draw anchor
With this option, you can draw a zone anchor on the document which is colored green rather than yellow as the standard zones.
The Anchor is a special function to verify and correct shifting delta when scanning the documents in order to adjust the zone coordinates considering the scanner shifting.
Anchor can be anything distinguish on the document such as: a customer logo, a header row, a footer section and so on. Make sure the select something which appears on every scanned document and which is good comparable and not mistaken with any other components appearing on the document. It is suggested to don’t include much white space around the real contents on which the zone is drawing to.
The process saves the Anchor zone on the sample document used assumed to be the reference document. For every scanned document the module will search the contents of the Anchor zone and, once located, compare the position to the reference image zone position. Any shifting found between the reference position will be counter applied to the zones position too.
• Delete the selected object
Delete the current selected zone.
Zones can be deleted also with the DEL keyboard key, once selected.
• Fit
Fit the document to the current view.
• One to One
Enlarge the document to the 100% zoom ratio into the current view.
• Zoom In
Zoom In the document into the current view.
• Zoom Out
Zoom out the document into the current view.
• Rotate Clockwise
Rotate clockwise direction the document by a manner of 45 degrees.
• Rotate Counter Clockwise
Rotate counter clockwise direction the document by a manner of the 45 degrees.
• Page
Displays the current preview page number on the total number of pages of the document.
• Previous page / Next page
Load and display the previous or next page preview of the document.
Engine
This section allows to customize general engine settings and recognition behavior for the current module.
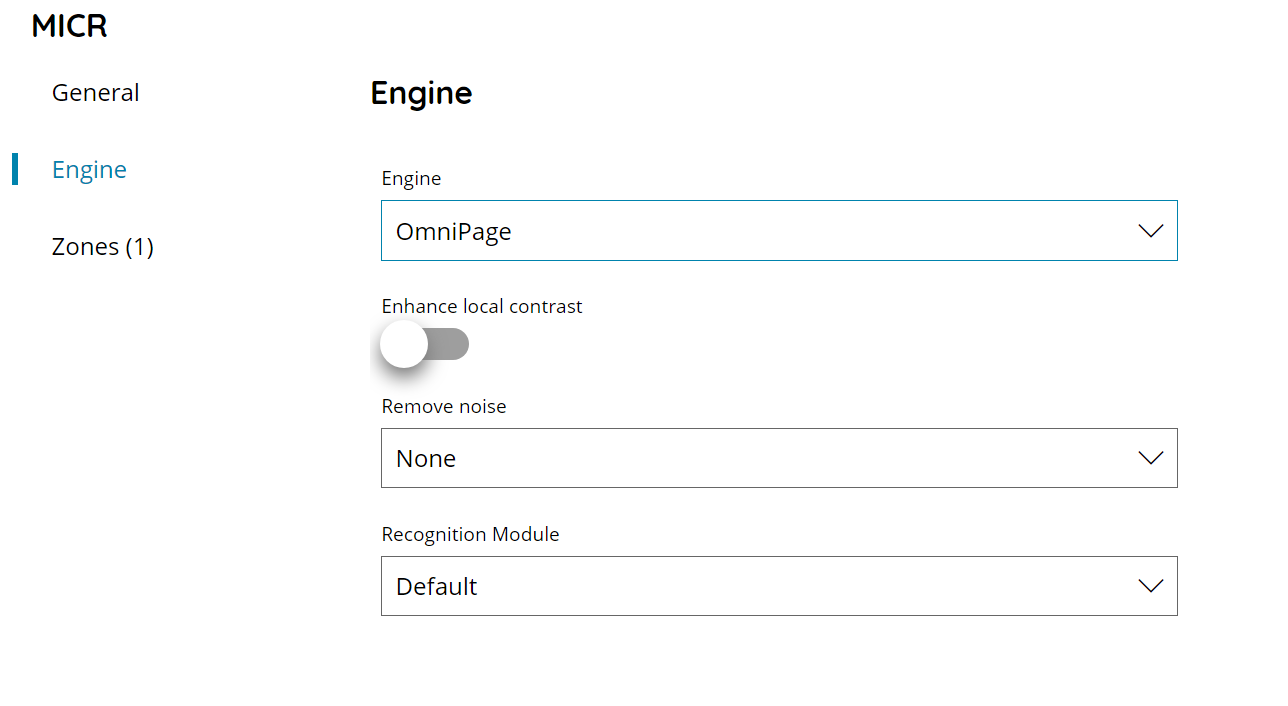
Engine
Select here the OCR engine to use to run the current recognition. Available engines are, based on the current license:
- Nuance OmniPage
- Abbyy FineReader
Based on the selected engine further settings will be displayed.
Enhance local contrast
If enabled engine will increase the local contrast of the image during the preprocessing of the image. Such option may increase the quality of recognition.
The images for which this preprocessing method is effective include:
- Photos or scans of documents with texture or pictures in the background. With the normal binarization procedure, the characters that coincide with darker areas of background may be lost or recognized unreliably. If you apply this method before recognition, such areas are detected, and contrast is increased, with the result that after binarization the characters stand out more distinctly.
- Photos or scans of documents with highly colorful background or text highlighting.
Remove noise
If enabled engine will reduce the noise of the image. Available working options are:
- White noise: this mode may be useful, for example, for uncompressed images with ISO less then 800, for reduced images.
- Correlated noise: this mode may be useful, for example, for the JPEG photos with high compression settings
Recognition Module
Specifies which recognition module the engine should use during the recognition. The Default option will choose automatically the best recognition module according the detected font and text. Available options are:
- OmniFontMText: this recognition module recognizes machine-printed text; i.e. text from printed publications, laser or ink-jet printers and electric typewriters. Output from mechanical typewriters in good condition may also be acceptable. It should also be used for Letter or Near Letter Quality output from dot-matrix printers, and can also be used for Draft Quality.
- OmniFontMor: this module recognizes machine-printed text; i.e. text from printed publications, laser or ink-jet printers and electric typewriters. Output from mechanical typewriters in good condition may also be acceptable. It should also be used for Letter or Near Letter Quality (LQ, NLQ) output from dot-matrix printers.
- DotMatrix: this module is designed for ONLY draft-quality 9-pin dot-matrix texts. For NLQ or LQ texts.
- MatrixMatching: this module is designed to read certain groups of fixed-font characters specially designed for OCR or imaging applications, in which no two characters have similar shapes. Each character group has its own filling method. Application areas are in banking, check or waybill handling, product distribution and document validation, where high accuracy can be vital. It also handles some non-fixed print styles.
- OmniFontPlus2WayVoting: these recognition modules recognize machine-printed text; i.e. text from printed publications, laser or ink-jet printers and electric typewriters. Output from mechanical typewriters in good condition may also be acceptable. The PLUS2WAY and PLUS3WAY modules use voting technology to improve recognition results. The PLUS2WAY voting module combines the results from the MOR and MTX modules. The PLUS3WAY voting module combines the results from the MOR, MTX and FRX modules. With either of these two voting modules, the accuracy is considerably better, but recognition may take significantly more time than any single module.
- OmniFontFireWorx: this module recognizes machine-printed text; i.e. text from printed publications, laser or ink-jet printers and electric typewriters. Output from mechanical typewriters in good condition may also be acceptable. It should also be used for Letter or Near Letter Quality (LQ, NLQ) output from dot-matrix printers.
- OmniFontPlus3WayVoting: same as the OmniFontPlus2WayVoting performing a 3 way process.
Zones
The table shows a list of all configured zones.

The view of the table is very easy and intuitive:
• Variable
The variable assigned to the zone which will contain the output result of the recognition.
• Text
The recognition result populated when testing or adding the zones.
• Id
The id associated with your zone. It is unique and it is the id of your zone inside the DB.
• Status
If the zone is enabled or not, a disabled zone will not be used. The status of a new zone is automatically set to true when a new zone is created. In the zones menu you can easily set this to false by clicking on the indicator. The zone will then be greyed out, the indicator will be gray and set to off and it will be skipped during the recognition.
Zone
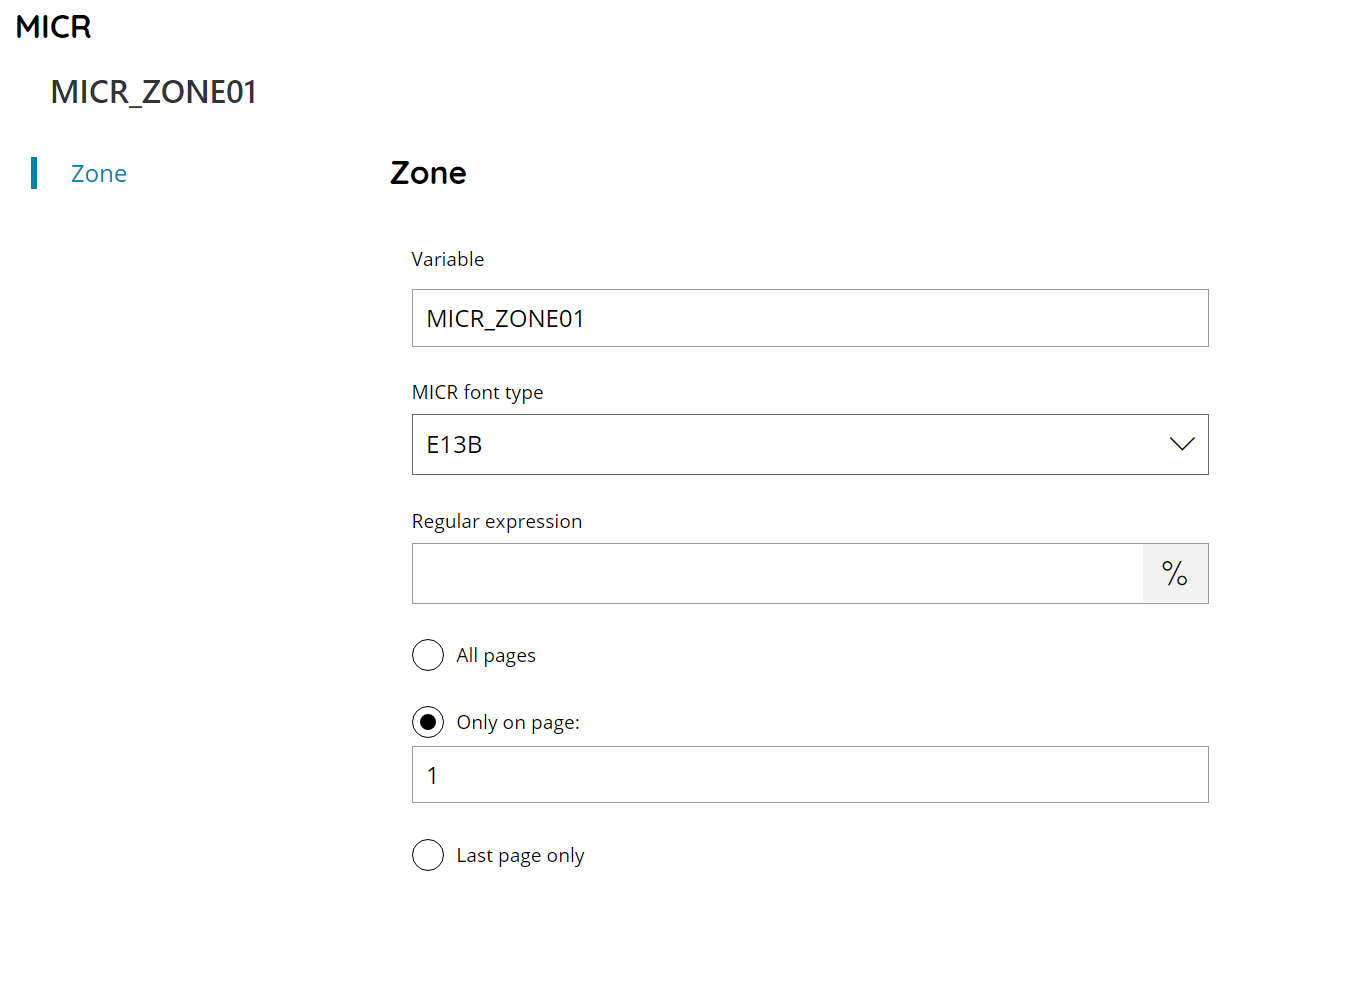
Variable
Enter the name of the variable which will contain the recognition result of this zone. If the variable is already existing in the current Workflow an error message will prevent the zone to be saved.
MICR font type
Select the type of magnetic ink font this zone is going to recognize. Available types are:
- CMC7
- E13B
Regular expression
Enter a regular expression to perform a match with the zone result, or click, or click the Variable button to select a variable which will contain a value for the expression.
The match is done on the full zone result and if the text is not matching the provided regular expression the result will be discarded and the zone variable will return empty.
For more information on regular expressions please check the Regular Expressions Appendix.
All pages
If selected the recognition will run automatically on all pages. When this option is enabled the current variable will always contain the last page result while an automatic variable for every page is created in the form of:
VARIABLENAME_PX
Where the current variable name, either automatic generated or customized, will be suffixed by _PX where X is the number of the page.
Only on page
Enter the number of the page where the current zone needs to be extracted. This automatically contains the number of the page of the sample document where the zone has been drawn.
Last page only
If selected the recognition will run only on the last page of the document, whatever number of pages the current document has got.