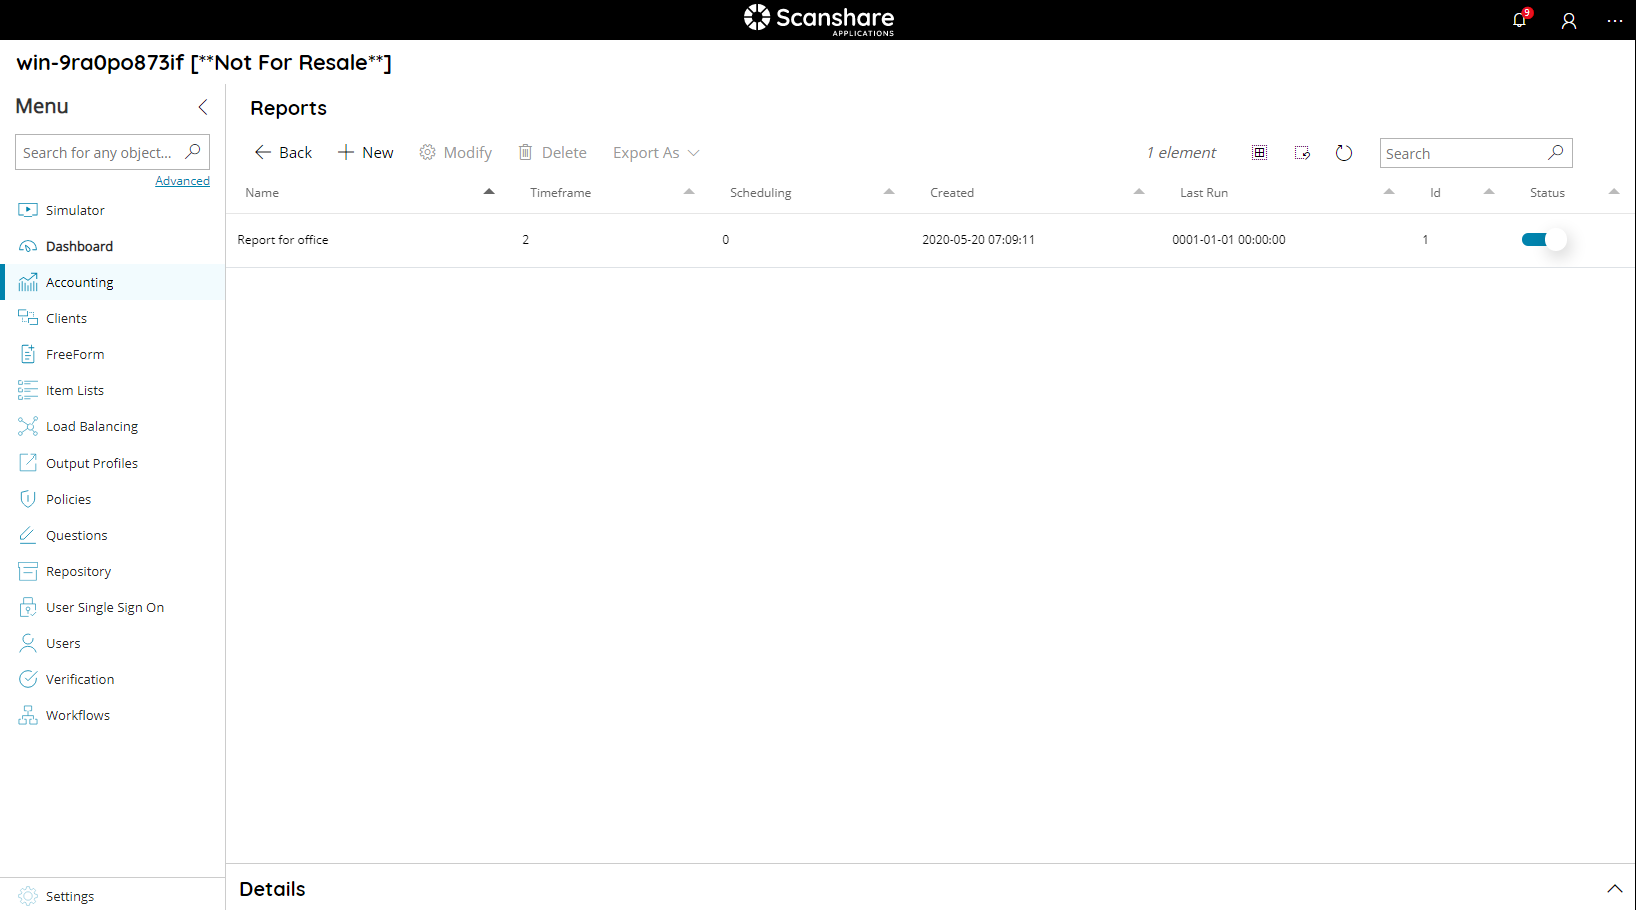
The reports page shows you a list of all configured report profiles.
It is also possible to search through the profiles by using the search function on the upper right side.

The view of the table is very easy and intuitive:
• Name
The name of report profile.
• Timeframe
The selected timeframe of the report.
• Scheduling
Scheduling active or not.
• Created
Creation date of the report profile.
• Last Run
Last Run date of the report profile.
• Id
The id associated with your profile. It is unique and it is the id of your profile inside the DB. For technical purpose only.
• Status
If the report profile is enabled or not. The status of a report is automatically set to true when a new report profile is created. In the report menu you can easily set this to false by clicking on the indicator. The report will then be grayed out, the indicator will be gray and set to off.
On the top of report profiles list there are report profiles controls.

• Back
Return back into accounting part section.
• New
Create a new report profile, opens the Create Report dialog.
• Modify
Modify the selected report profile, opens the Create Report dialog.
• Delete
Delete the selected report profile.
• Export As
Export the current selected report profile in the selected format. This option generates the report according the profile settings and filters considering the timeframe from Now.
Always on Top Bar on the right hand side we can find general list controls.
• # elements
Number of the report profiles available in the list.
• Select all
Select all report profiles available in the list.
• Unselect all
Unselect all report profiles available in the list.
• Refresh
Refresh the report profiles list (reload profiles).
• Search
Filter the list by either information available for each profile:
- name
- job type
- job color mode
- scheduling
- last run time
On the bottom of the page there is a details dialog, it shows-up when you click on a profile and here you can quickly view information about the selected report profile.
