Front
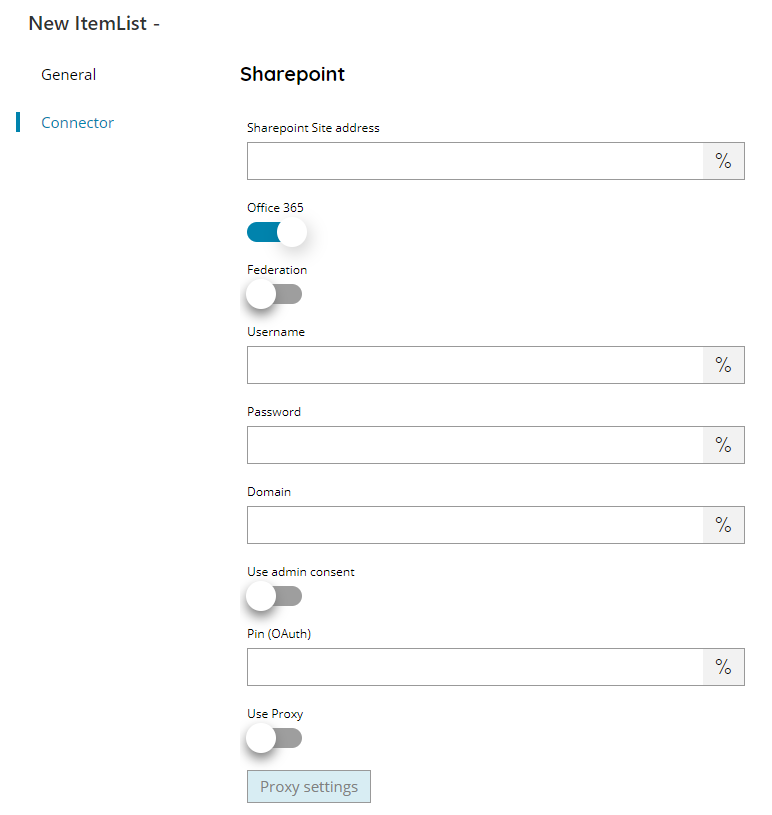
Sharepoint site address
Enter the name of the Sharepoint site address you want to upload to. If you need to connect to an Office 365 website select the checkbox on the right.
Office 365
Switch on to perform connection to Office 365 Sharepoint online servers. If OFF it is assuming a connection to a on premise Sharepoint server. The option is exclusive with Federation option.
When connecting to Office 365 both standard and OAuth authentication can be used according if the OAuth fields below are used.
Federation
Use Federated authentication for on premise Sharepoint servers, when required. The option is exclusive with Office 365 option.
Username, Password and Domain
Enter the username, password and domain of a user who has access to the Sharepoint site.
Use admin consent
If enabled uses the OAuth administrator consent given via a preconfigured SSO profile on the same tenant domain of the user.
By using this option PIN is not required because tenant administrator will access the specified user storage. For more info refer to the SSO profiles.
PIN
Enter your OneDrive for business PIN here, or click on the Variables button on the right, to select a variable which will contain the PIN. (PIN will be created in OAuth User settings).
Use proxy
If your administrator has set up a proxy for your internet connections, you should check this option and provide proxy details by selecting the Proxy Settings button below. Ask your administrator for help in order to provide correct proxy settings.
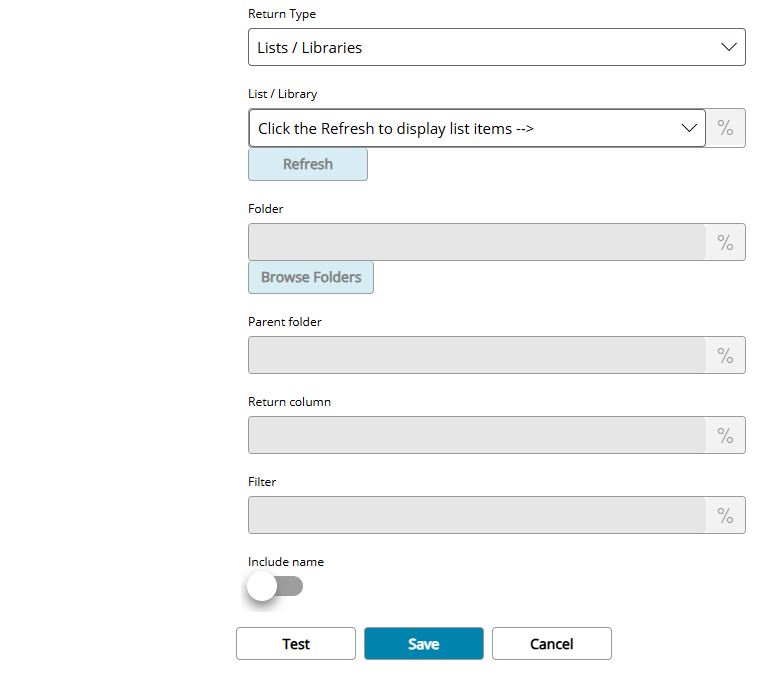
Return Type
Select the type of list to display. This can either be:
- Sites
- List / Library
- Folder
- List items
Default return format is ID;#Value or an internal item ID when using OAuth authentication on Office 365.
List / Library
If a connection can be made with Sharepoint, using the settings you provided in the previous entries, then you can select this button, which will give you a list of available Lists/Libraries, from which you can select one to retrieve the items from.
Folder (only available with return type Folders)
Enter the folder from where query sub folders from Sharepoint, select a folder by pressing the browse folders button or click on the Variables button on the right, to select a variable which will contain the folder.
Parent Folder (only available with return type List items)
Enter the Parent folder to find the List items in Sharepoint here, or click on the Variables button on the right, to select a variable which will contain the parent folder. This field only needs to be filled if the List items have a folder structure, so you will be able to pick up sub-folders.
Return column (only available with return type List items)
Enter the return column in Sharepoint here, or click on the Variables button on the right, to select a variable which will contain the return column. This field only needs to be filled if the return column is different then the default one, e.g. a different column is intended to be returned rather than default ID. When left empty, the default return column is used for the selected List item.
Filter (available with return type Folders or List items)
Enter a filter for the folders or list items in Sharepoint here, or click on the Variables button on the right, to select a variable which will contain the filter. The filter behaves differently according if returning Folders or List Items.
Folders
Enter the text which the folder name contains.
Special filter formats are available:
- CONTAINS=XXX, where the folder name contains XXX
- BEGINSWITH=XXX, where the folder name starts with XXX
- EQUALS=XXX, where the folder name is equal to XXX
- NOTEQUALS=XXX, where the folder name is not equal to XXX
(replace XXX with your current Variable / Value)
List items
The filter requires the following format:
COLUMNNAME=XXX
Which returns only the list items where the value inside the COLUMNAME is equal to XXX.
Include name
If enabled will include the name of the folder in the returned value separated by a ” – ” (space, dash, space) string, otherwise just the internal ID required for the Store setting.
Example:
foldername – folderid
Store
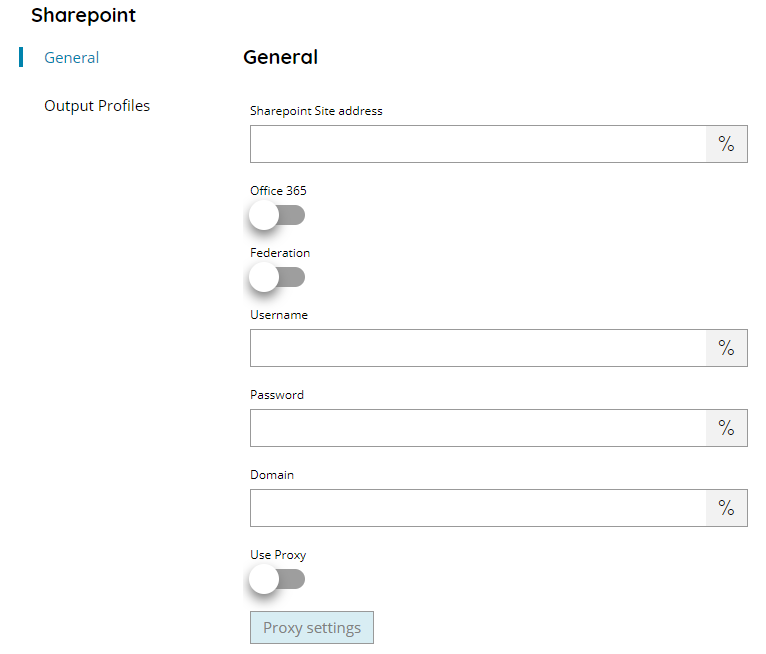
Sharepoint site address
Enter the name of the Sharepoint site address you want to upload to. If you need to connect to an Office 365 website select the checkbox on the right.
Office 365
Switch on to perform connection to Office 365 Sharepoint online servers. If OFF it is assuming a connection to a on premise Sharepoint server. The option is exclusive with Federation option.
When connecting to Office 365 both standard and OAuth authentication can be used according if the OAuth fields below are used.
Federation
Use Federated authentication for on premise Sharepoint servers, when required. The option is exclusive with Office 365 option.
Username, Password and Domain
Enter the username, password and domain of a user who has access to the Sharepoint site.
Use admin consent
If enabled uses the OAuth administrator consent given via a preconfigured SSO profile on the same tenant domain of the user.
By using this option PIN is not required because tenant administrator will access the specified user storage. For more info refer to the SSO profiles.
PIN
Enter your OneDrive for business PIN here, or click on the Variables button on the right, to select a variable which will contain the PIN. (PIN will be created in OAuth User settings).
Use proxy
If your administrator has set up a proxy for your internet connections, you should check this option and provide proxy details by selecting the Proxy Settings button below. Ask your administrator for help in order to provide correct proxy settings.
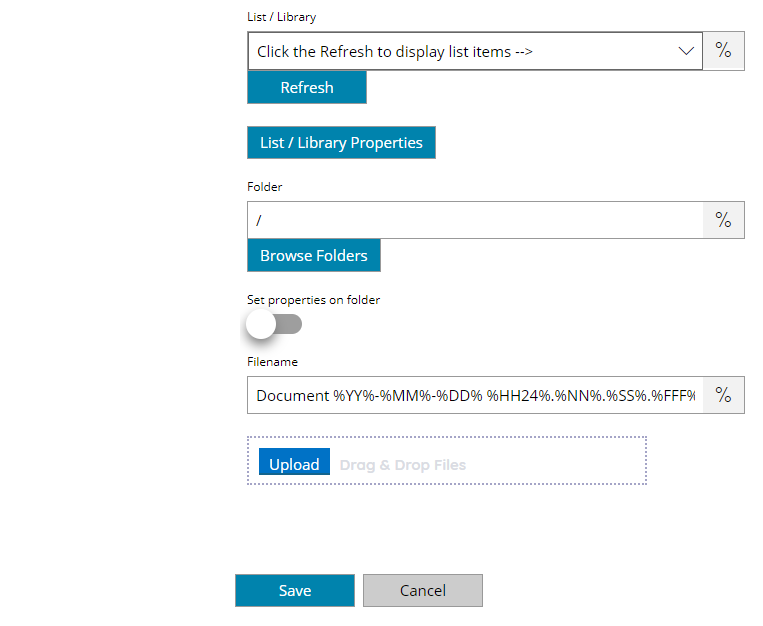
List / Library
If a connection can be made with Sharepoint, using the settings you provided in the previous entries, then you can select this button, which will give you a list of available Lists/Libraries, from which you can select one to upload the document to.
List / Library Properties
The properties menu will prompt a screen, allowing you to add values to different column fields defined in the selected list/Library within Sharepoint. The available columns will automatically be filled if the connection to your Sharepoint site is made correctly.
Make sure to enter the Properties value according their type otherwise they may appear empty on the uploaded document, in this case a warning message might be logged in the process logs.
If the your property is a date Sharepoint field from the Scanshare must respect the format required by SharePoint.
Folder
Enter the folder from where upload the document to Sharepoint, select a folder by pressing the browse folders button or click on the Variables button on the right, to select a variable which will contain the folder.
The Folder can be a single direct folder or a full path composed by subfolders separated by / (forward slash).
Each folder, either a single folder or part of the path, can be an ID returned by the front connector return items folders or a named folder (e.g. root/folder/subfolder).
If a folder doesn’t exist it will be created, at any level of the path. The full path can be also created if not existing (e.g. root/folder/subfolder/newfolder/newsubfolder).
Set properties on folder
if you need to set the properties of the folders, you should check this option and the same properties of the last uploaded document will be set.
Filename
Enter the filename for the document to upload to SharePoint, or click on the Variables button on the right, to select a variable which will contain the filename.
Document upload test
By clicking this button, a window will open where you can select a document to upload to Sharepoint. It is also possible to drag and drop a file into this box which will be uploaded to Sharepoint as well. A sample upload will be performed into the target List / Library / Folder.