The General settings section contains settings regarding overall general functionalities at server level.
The left hand side menu shows the available settings general categories. Settings are displayed according the selected category.
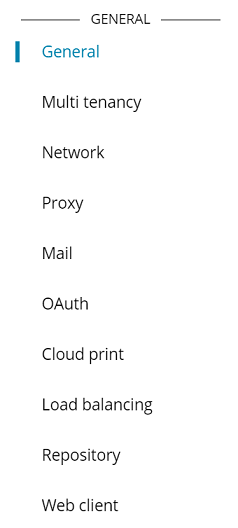
General
General
The General category provides settings for general not specific basic items.
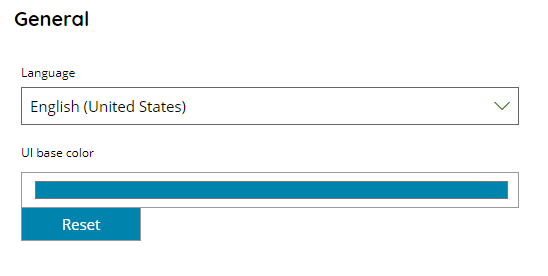
Language
Select the desired language for your application. After saving a new language the UI will be reloaded into the new language.
UI base color
Select the full application stylesheet base color. After saving the UI will be reloaded with the new stylesheet modifications. Use the Reset button to restore the default values.
Home
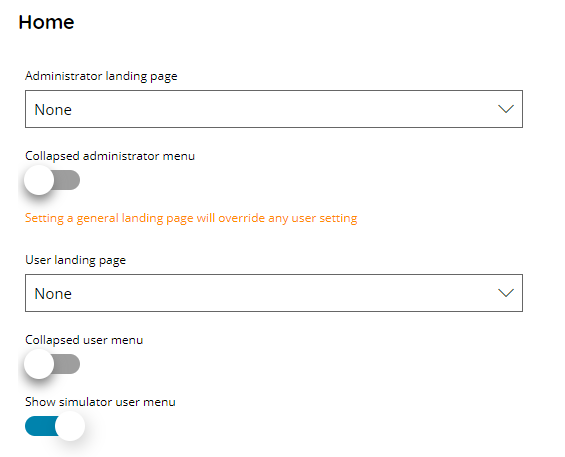
Administrator landing page
Select the default landing page after administrator account login instead of the Dashboard page when the setting is not in use (None).
Collapsed Administrator menu
If enabled will show the main menu collapsed by default after administrator logins.
User landing page
Select the default landing page after any regular user, not administrator, account login instead of the Dashboard page when the setting is not in use (None).
Collapsed User menu
If enabled will show the main menu collapsed by default after any regular user, not administrator, logins.
Show simulator user menu
If enabled will display the Simulator menu entry, otherwise hide it, when any regular user, not administrator, logins.
Multi tenancy
The Multi tenancy category provides options to customize the server working behavior in Multi Tenancy mode.
Enable
Enable or disable the multi tenancy mode. When saving the application will reload into the enabled / disabled mode.
Network
The network category provides settings related to the general server network operations.
Network
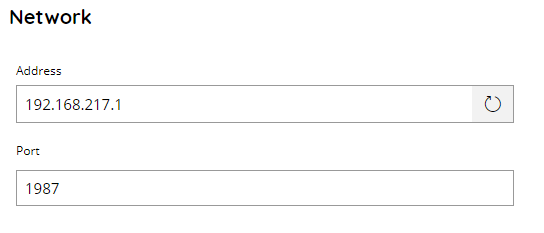
Address
Set the current server IP address or use the refresh button to reload it automatically.
Server IP address is automatically used anywhere in the application where the server address needs to be communicated, e.g.: embedded web clients, load balancing, local network operations.
Always make sure reflects the correct local IP address.
Port
Default network internal core port.
Normally this port is accessed locally by other network services and never directly by a client.
API
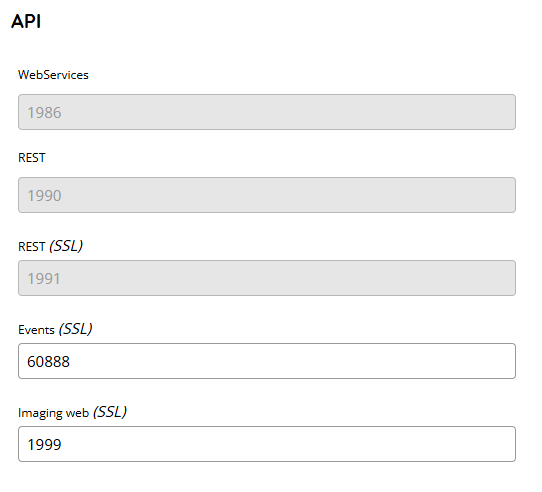
WebServices
Default network webservices port.
REST
Default REST API port.
REST (SSL)
Default REST API with SSL port.
Events (SSL)
Default Events web socket with SSL port.
Imaging web (SSL)
Default Imaging Web API port.
SSL
SSL ports require an existing installed certificate configured at the Scanshare installation. If the certificate expires or needs to be changed a new re-binding is required composed by the removal of the existing one and adding of the new one.
To remove an existing binding the following command, as administrator, can be used:
netsh http delete sslcert ipport=0.0.0.0:PORTNUMBERTo add a new binding the following command, as administrator, can be used:
netsh http add sslcert ipport=0.0.0.0:PORTNUMBER certhash=CERTHUMBPRINT appid={4418F59C-B8D3-46D5-9AE3-3114B076FB41}FTP
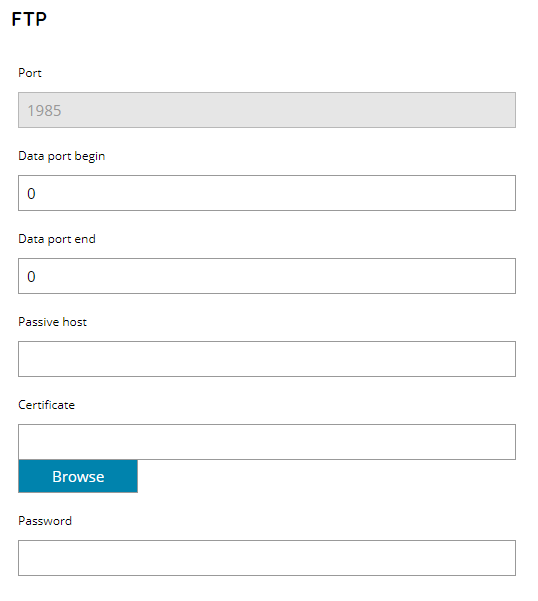
Port
Default FTP server port.
Data port begin
Specify a custom port number as starting range for the passive data ports range. Default 0 will allocate a random port.
Data port end
Specify a custom port number as ending range for the passive data ports range. Default 0 will allocate a random port.
Passive host
Specify the FTP server host / address to be communicated over a PASV command together with the allocated data port.
Useful when the server is behind a NAT and the NAT address will be communicated rather than the real effective server address.
Certificate
Enter or browse to the location of the certificate which will be used to protect the FTP communication.
The certificate is expected to be in the format of PFX or P12, inclusive of the private key for authentication.
Password
Enter your Certificate password here.
Proxy
Enter any proxy settings Scanshare server shall using during network communication.
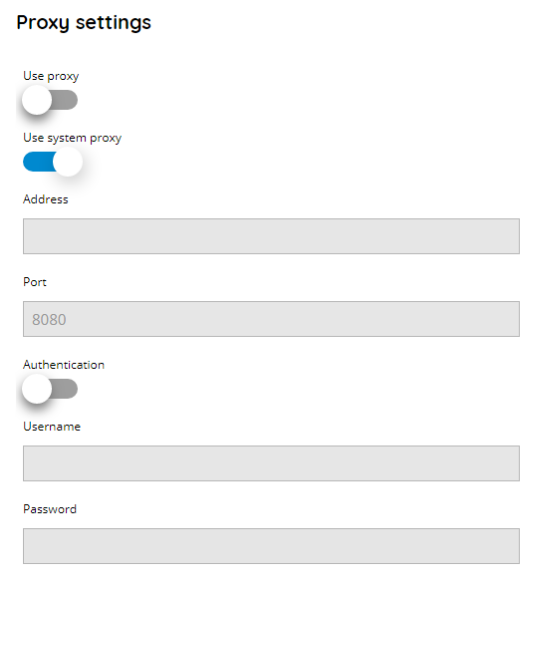
Use proxy
Enable to use the proxy settings.
Use system proxy
If enabled system default proxy settings, if defined, will be used.
Address
The IP address of the proxy server.
Port
The port number of the proxy server.
Authentication
If enabled authentication over the proxy will be performed with the credentials below.
Username & Password
If the proxy has been set up with the need to provide user credentials enter them here, otherwise leave them empty.
The Mail category provides options to configure the Scanshare server mail server.
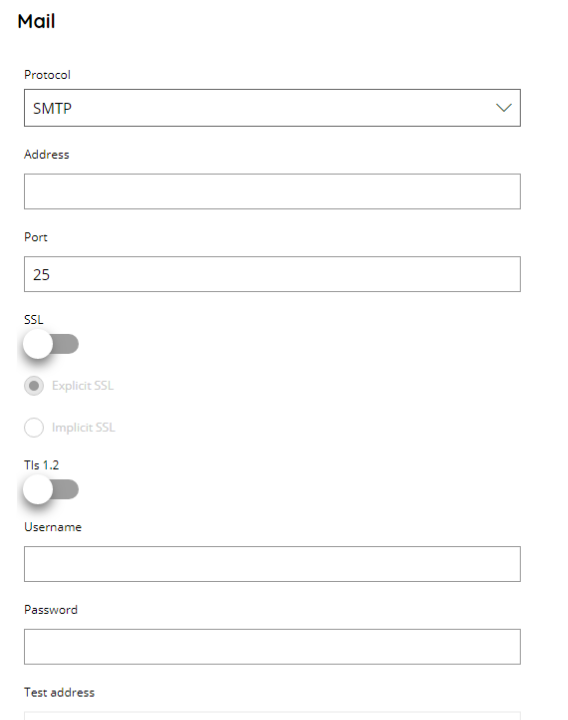
Protocol
Specify which protocol to use to connect to the target provided server. Available options are:
- SMTP
- Exchange
- Office 365
Fields are changing based on the selected protocol. When using Office 365 connection authentication requires OAuth.
Address
Enter the mail server address where to connect to.
Port
Enter the target mail server port where to contact to.
SSL
If enabled SSL will be used during connection. Make sure the specify the correct SSL port in the Port field above as normally a different port is used for SSL connections.
Explicit SSL
If enabled an Explicit SSL connection will be performed. This is used when the connection is established in clear and the client will request to start a TLS connection, e.g. STARTTLS commands.
Implicit SSL
If enabled an Implicit SSL connection will be performed. This is used when the client starts negotiating SSL before sending the EHLO/HELO command.
Tls 1.2
If enabled forces a SSL connection using the Tls 1.2 protocol version.
Domain
Enter the domain for the authentication, if required.
Domain will be used in combination of the provided username.
Username
Enter a valid username here.
Password (not required for Office 365)
Enter a valid password here.
Keep sent mails (available only for Exchange and Office 365)
If enable retains a copy of the sent mail in the default Sent Items mailbox folder.
Test address
Enter a test email address where to send a test email by using the provided settings above. Use the Send test E-mail button to sent the test mail.
OAuth
The OAuth category provides options to customize some functions of the OAuth processes.
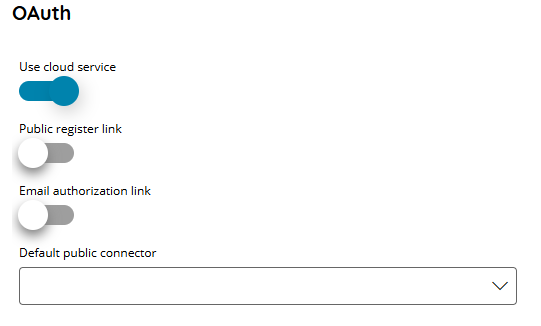
Use cloud service
If enabled the OAuth operations such as token request and token refresh will be requested via the Scanshare cloud service rather than directly by the local application.
The cloud service is intended to overclass local DNS requirements to validate against the redirect URI validation of the OAuth protocol.
Public register link
If enabled, an extra New OAuth User button will appear at the Scanshare login screen. The option allows users to add a new OAuth user without having to log in to the server.
Email authorization link
If enabled when a not existing OAuth user is used anywhere where OAuth is required, Scanshare will send automatically an email with the authorization link to register a new user.
The receipient of the mail is the user mail address used during the OAuth functions. The authorization link will point to the local Scanshare server installation with a mobile friendly form to register a New OAuth User.
Default public connector
Select the default connector to use when using Public register link option.
Cloud print
The Cloud print category allows to setup an Azure Universal Print tenant in order to be used along Scanshare cloud print functions.
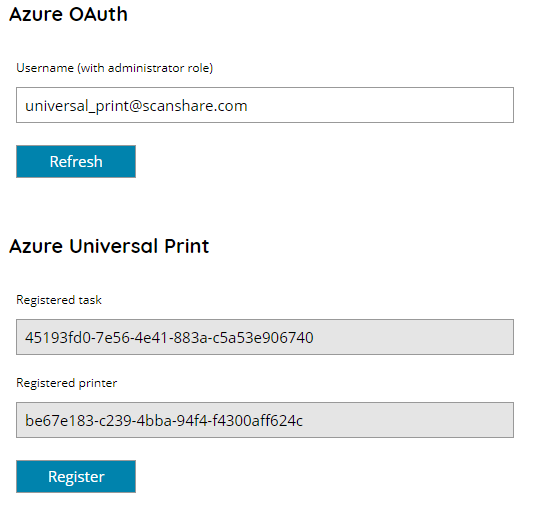
Azure OAuth
Username (with administrator role)
Enter the username of an administrator of the target Azure tenant with Universal Print enabled.
Use the Authorize button to execute the OAuth grant process and connect Scanshare to the Azure tenant or use the Refresh button to refresh an existing connected token.
Azure Universal Print
Registered task
The internal GUID of the registered Scanshare Cloud Print job task in the target Azure Universal Print tenant.
Registered printer
The internal GUID of the created and registered virtual Scanshare Cloud printer in the target Azure Universal Print tenant.
Use the Register button to create, register or update the target Azure Universal Print tenant. A new virtual printer and a job task will be created if not existing or updated and refreshed if already existing.
Load balancing
The Load balancing category allows to customize the server base configuration when the Load Balancing module is used.
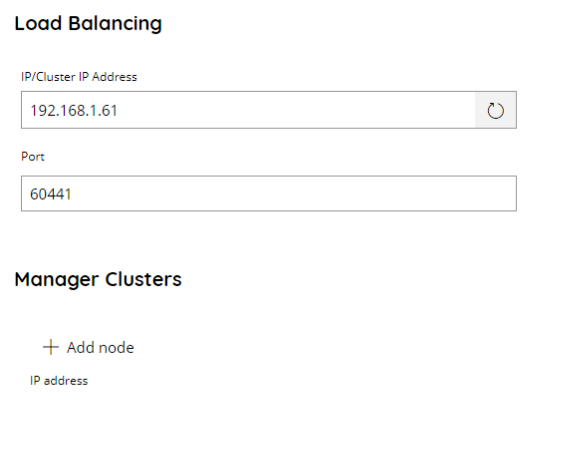
Load balancing
IP/Cluster IP Address
Set the current Load Balancing server IP address or use the refresh button to reload it automatically. The IP is used as connection endpoint for all clusters deployed from this installation.
Always make sure reflects the correct local IP address.
Port
Set the network port of load balancing webservices, by default it is 60441.
Manager clusters
In this section add any Scanshare installation in the same local network which needs to be working as a manager cluster role. Check the Load Balancing section for more information.
Use the Add node button to add a new cluster and insert its IP address. Use the red cross delete button to remove it.
Repository
The Repository category allows to customize default server Repository settings and services and customize existing Document Types.
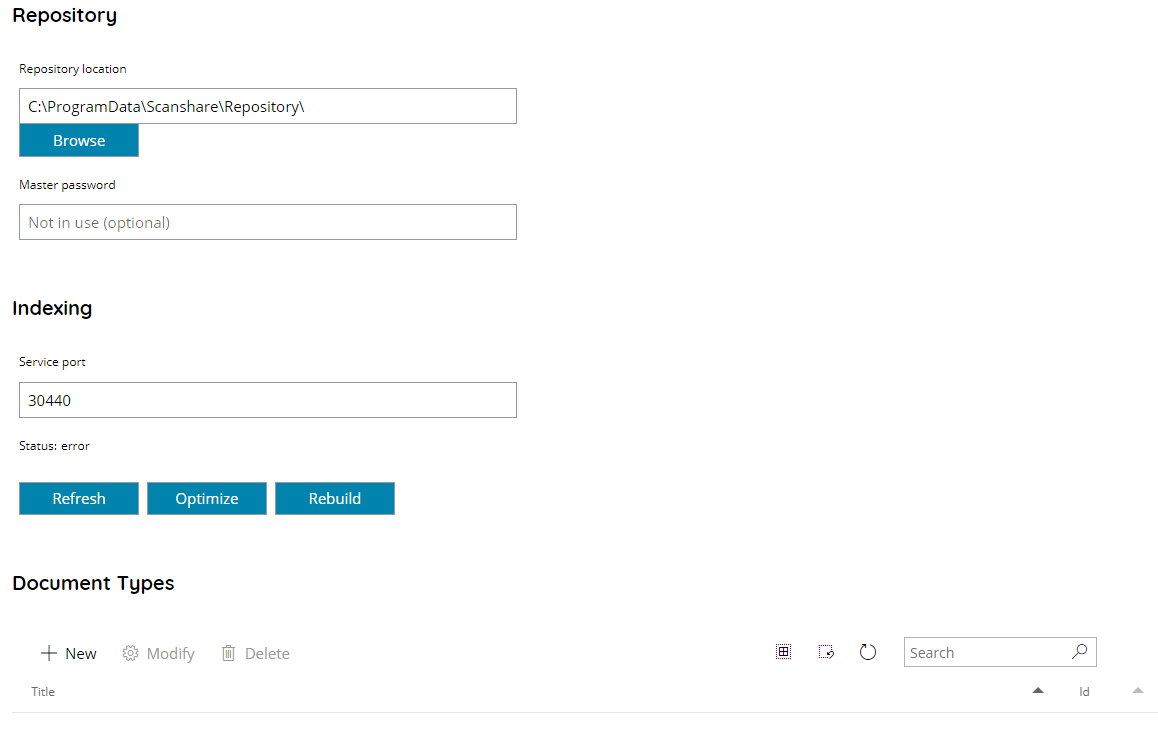
Repository
Repository location
The root physical location repository file system structure, by default it is located under the Scanshare ProgramData folder.
The location contains documents physically stored on disk while not the real file system. For more information check the Repository section.
Network paths in the form of full UNC paths are allowed as well in this field.
Master password
Enter a master password which is used in the seed to generate the random AES key which encrypts Repository documents.
Master password provides a way to decrypt the Repository contents in case access to the application is lost. Master password can be changed anytime and can be cleared by empty the field.
Indexing
Service port
Set the network port on which the Repository Indexing service is communicating, default port is 30440.
Status
Reports the current status of the Repository Indexing service, possible values are:
- Unknown
- Error
- Idle
- Ready
- Healthy
- Indexing
- Crawling
- OCRing
- Optimizing
- Rebuilding
- Scheduled
- Corrupted
Refresh: using the Refresh button will refresh the current Indexing service status by querying the status to the Indexing service.
Optimize: fire a manual optimization of all indices stored in the Repository Indexing database.
Rebuild: fire a manual rebuilding of all indices stored in the Repository Indexing database.
Document Types
The table shows a list of all configured Document Types.
It is also possible to search through the document types by using the search function on the upper right side.
The view of the table is very easy and intuitive:
• Title
The title (name) of the Document Type.
• Id
The id associated with your document type. It is unique and it is the id of your document type inside the DB.
By pressing the New button a new Document Type can be created. The same dialog is displayed when editing existing Document Types from the list.
The left hand side menu shows the available settings section. Settings are displayed according the selected section.

Name
The name to identify the Document Type.
Auto filing
If enabled it will enable the auto filing (destination folder structure), according the specified below Location, of all documents uploaded and set to be this document type. When disabled the destination folder will be the one where the upload is performed.
Location
Set the target path, from the root of the Repository, where the document needs to be auto-filed. Location can be composed of manual parts or dynamic parts with the properties below. Hold on a property name to automatically add it as part of the location, dynamic property parts are written in capital letters and between [ ] square brackets.
Example of locations:
Contracts/New: All documents will be stored in the sub folder New of the root folder Contracts.
Contracts/[CUSTOMER]/New: All documents will be stored in the subfolder New under a dynamic folder with the value of the property Customer for the current document, all in the root folder Contracts.
Properties
Add properties for this document type, use the Add Property button and fill the Name of each property. The document type properties added here will appear as default properties everytime this document type is set on a document.
The Default field allows to enter a value which will automatically populated when the property appears on the documents (default value of new properties).
The Item list combo box lists all available Item Lists in this Scanshare server and allows to select one of them to populate values at the time a New Document is uploaded in the Repository. The Item list allows to set dynamically browsable values for the current property rather than typing manually a value.
WebClient
The WebClient category allows to customize the default WebClient working settings.

Use Workflow Groups
If enabled workflows will be displayed grouped according their group. The WebClient will show a first screen of workflows groups and then the workflows inside the selected group.