Dashboard
The Web Client menu brings you to the Scanshare Web Client dashboard.
Web Client is a Scanshare user based client which allows any user to import / scan / upload documents into any Scanshare configured Workflow. The Web Client brings any embedded client functionalities into a fully web based client available from any user PC without requiring to install any client application.
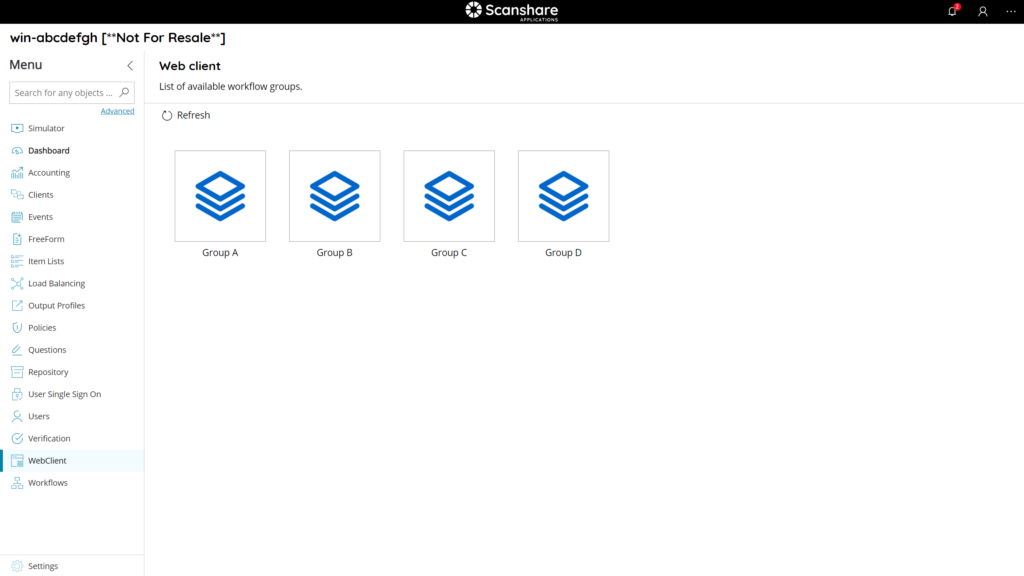
A first use access will load automatically the available Workflows Groups, if Groups are enabled in the Server Settings. They can be customized based on the current User or User SSO permissions. A Refresh button is available on top left to reload the current Workflow Groups.
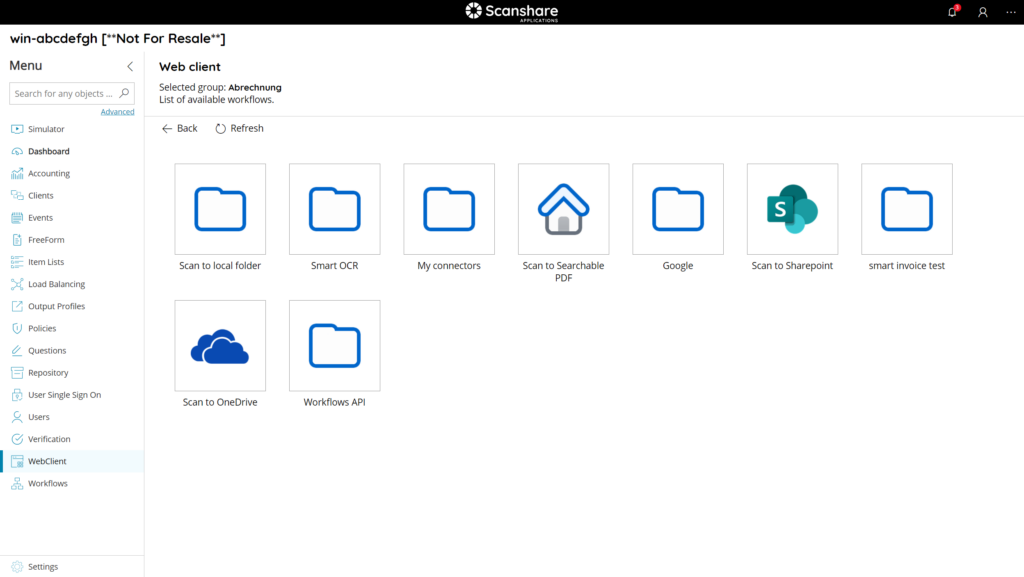
By selecting one of the available Workflow Group the next screen will load automatically the available Workflows configured to be in the selected Group. A Back button is available on top left to return to the Workflows Groups selection, or a Refresh button is also available to reload the current Workflows inside the selected Workflow Group.
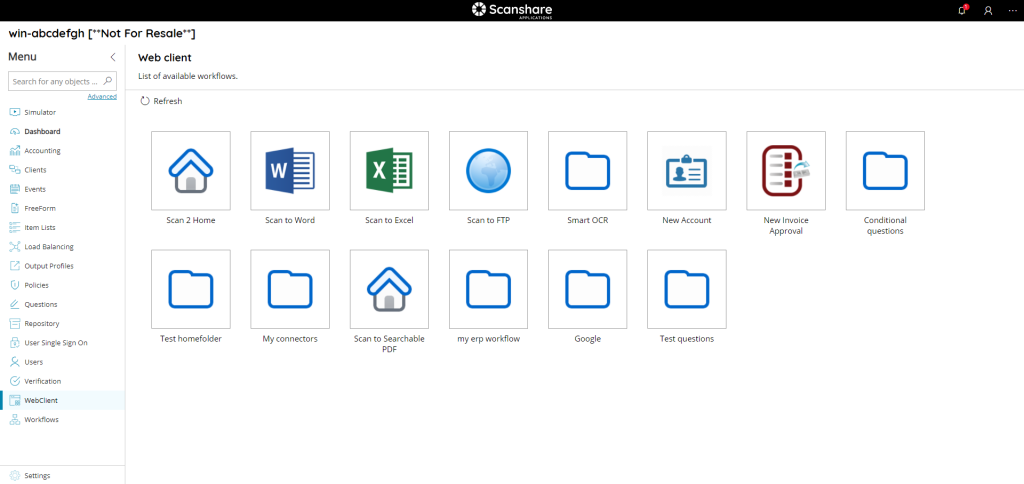
A first use access, when Workflow Groups are disabled, will instead load automatically the available Workflows directly. They can be customized based on the current User or User SSO permissions. A Refresh button is available only on top left to reload the current Workflows, no selected Workflow Group mention is displayed.
By selecting one of the available Workflow the user is able to import / scan the document to store with the current Workflow and fill any questions, if configured for the current Workflow.
Some working behavior can be customized here with the Web Client capture module settings for the current selected Workflow.
Viewer
On the top left bar document controls are available:
• Scan
Start a TWAIN scan job to acquire a document by using any local scanner.
• Previous page / Next page
Load and display the previous or next page preview of the document.
• Zoom Out
Zoom out the document into the current view.
• Zoom Percentage
Zoom the document at the custom percentage level
• Zoom In
Zoom In the document into the current view.
• Rotate Counter Clockwise
Rotate counter clockwise direction the document by a manner of the 45 degrees.
• Rotate Clockwise
Rotate clockwise direction the document by a manner of 45 degrees.
• Page View Mode
Select the desired page view mode. Available options are:
- Continuous: render the pages in one unique scrolling view
- Separated: render the pages one by one while browsing them
• Mouse Mode
Select the desired mouse operation mode when clicking on the viewer. Available options are:
- Pan mode: allows to navigate the document by holding the left mouse button in a specific area of the preview
- Select mode: allows to draw a box to perform a live text recognition, if Text Extraction is enabled
- Marquee mode: select an area where to zoom in the document
• Full screen
Toggle preview rendering at full screen
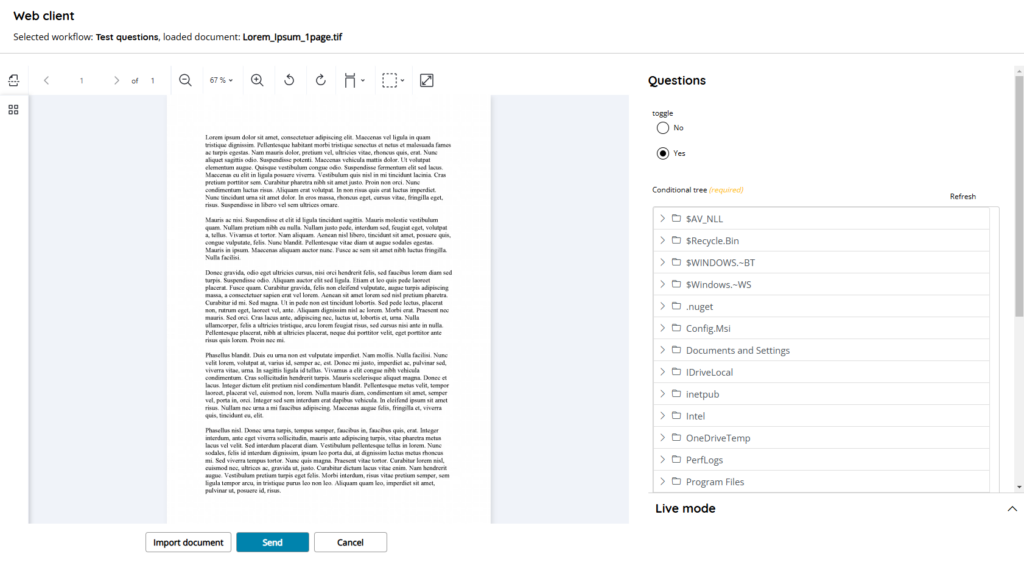
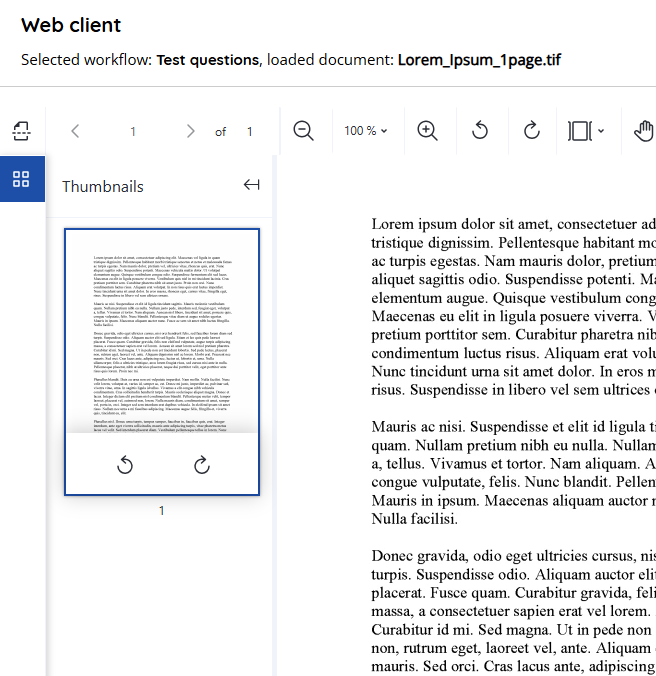
On the left bar Thumbnails are available for a faster and easy document navigation. By clicking the Thumbnails button the thumbnails pane will open.
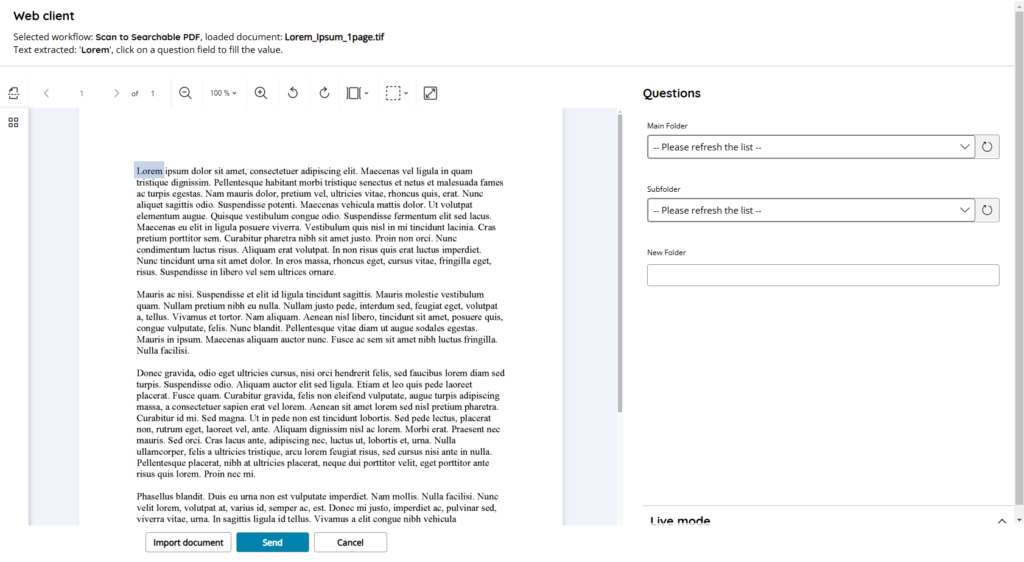
In the right part available questions are displayed and can be answered.
Required questions are marked with a yellow tag and if they are not filled a warning notification will be generated when attempting to send the document.
In the bottom part the controls to operate the Workflow are displayed:
Import document
Browse to open and load (by uploading to the server) a sample document to render on the preview pane.
The document is uploaded at the time of the selection and it stored temporary on the server until the current job is sent.
Multiple documents selection is available in the popup dialog appearing when the button is clicked. When multiple documents are selected they will be uploaded all together and merged into one unique document job. The preview will render the whole merged document.
Importing of documents can be done also by dropping one or more documents into the preview area.
Send
Allows the complete the current job and submit the document and filled questions data. If any required question is not filled at this stage a warning notification message is generated and send process interrupts.
Cancel
Cancel the current job and return to the list of all available Workflows.
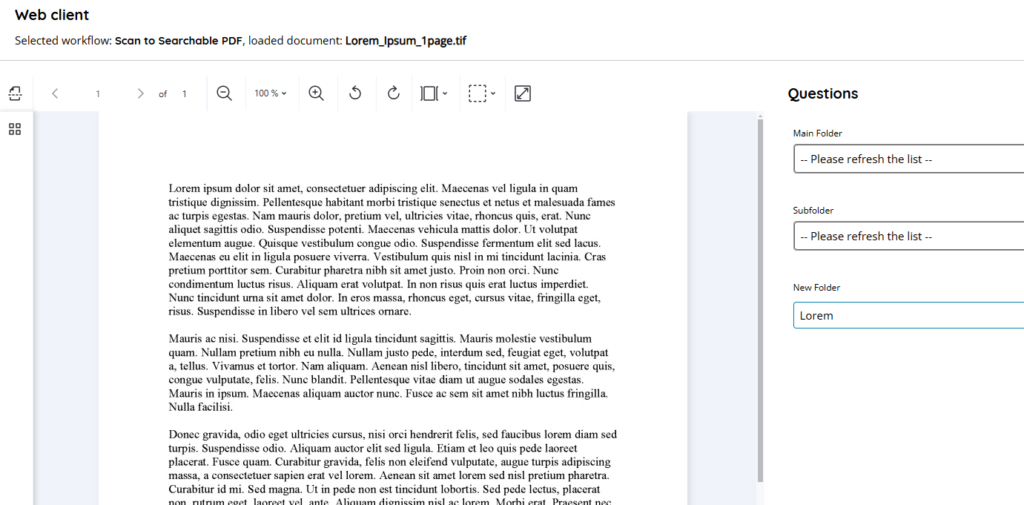
Text Recognition
Live Zone OCR is available when Text Recognition is enabled in the WebClient capture module settings for the current Workflow.
When enabled the default pointer on the document preview allows drawing a rectangle area to live recognize and extract. You may switch between the different Mouse Modes with the top bar button.
Once text has been recognized a status message, with the recognized text, will be displayed below the title bar and it is held for the target question where to insert it.
By clicking on a Typed question the recognized text will be automatically pasted and recognition result, and status message, cleared.
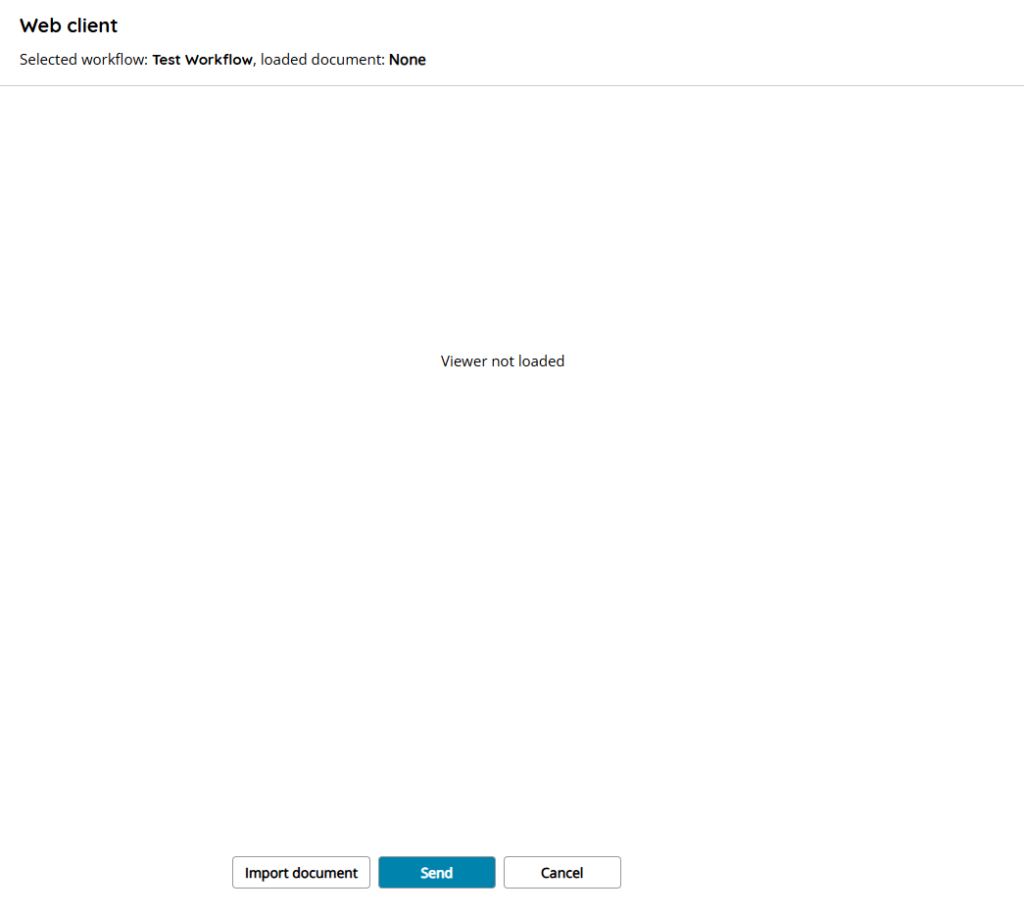
Network Configuration
The Web Client Viewer is an advanced imaging components which works seamless with a background service to handle server-side all image operations.
If communication with the service fails or doesn’t work property the Viewer is not loaded while the Web Client keeps working. An error notification about the failed loading is also generated.
Ensure the Scanshare main network address is correct and that it is matching the URL (IP) you are using the browse the Scanshare Web Control Panel from your browser.
Example:
Network address: 192.168.1.100
Scanshare URL in use: https://192.168.1.100:60440
If you use a custom DNS to browse Scanshare Web Control Panel rather than the direct IP address, then you need to configure the custom Imaging Web address setting, inside the Scanshare Service menu, with that same DNS.
When this setting is specified, it is overriding the network IP address.
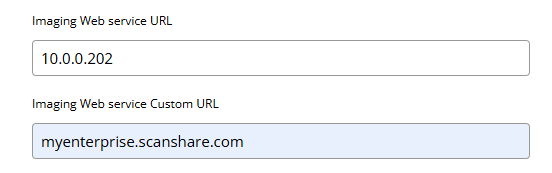
Example:
Scanshare URL in use: https://myenteprise.scanshare.com:60440
TWAIN Scanning
TWAIN scanning allows to acquire any document using any local or network scanner for which TWAIN drivers are installed.
The Web Client TWAIN scanning function requires the installation of a local TWAIN Daemon which allows local inter-process communication between the Web Application and the local installed TWAIN drivers. If the Daemon is not installed or requires an update a notification will appear directly inside the TWAIN dialog, including a link to download the Daemon.
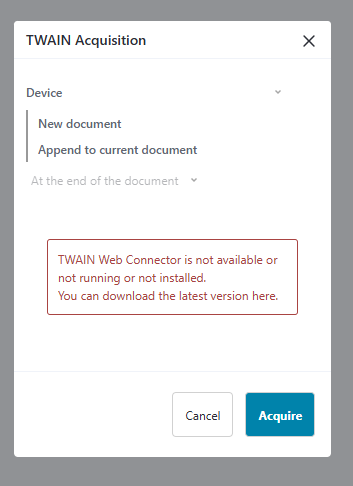
Click on the word here to download the Daemon installer.
After the Daemon is installed TWAIN scanning is automatically working without requiring any additional configuration or any system restart nor modification. By simply closing and re-opening the TWAIN dialog scanning will become operative.
TWAIN Acquisition
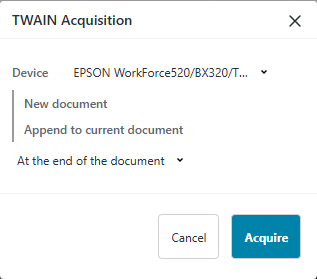
Device
Select the target scanning to use for acquisition, the list displayed the installed and available TWAIN drivers on the system.
New document / Append to current document
If no documents are already imported in the Web Client Viewer only the New document option is enabled and the acquisition will import the scanned document into the Viewer.
If any document is already imported in the Web Client Viewer the Append to current document option is enabled as well allowing to add the scanned document into the current one at the specified position:
- At the end of the document
- Before the current page
- After the current page
Live Mode
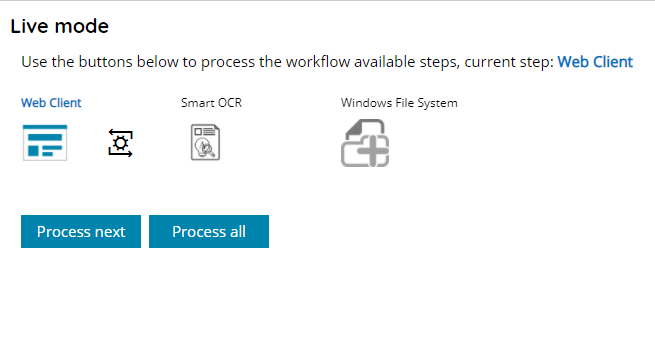
The right bottom part displays the Live mode pane if enabled for the current Workflow. When clicking on the pane the Live Mode is activated and the current Workflow design is rendered showing the immediate first module. Contextually the Send button will disappear because the current Workflow operates only in Live Mode.
Live Mode is a synchronous processing operated by a specific Scanshare processing service dedicated to this task. It doesn’t interfere with the standard processing service and all processing Workflow tasks.
According the current Workflow capture settings Live Mode can operate automatically when it has been opened or manually with the Process Next and Process All buttons.
Process Next will execute the next module in line, the progress will be reported in the Live Mode Workflow preview. Once the process is completed the status is reported and the document and / or the questions are updated with the current status of both after the module processing.
The Process Next button can be operated till the last module when the Workflow will complete and close automatically.
When using the Process All button, instead, the Workflow will run till the end and automatically complete or wait for the last module (according the current Workflow capture settings).