Front
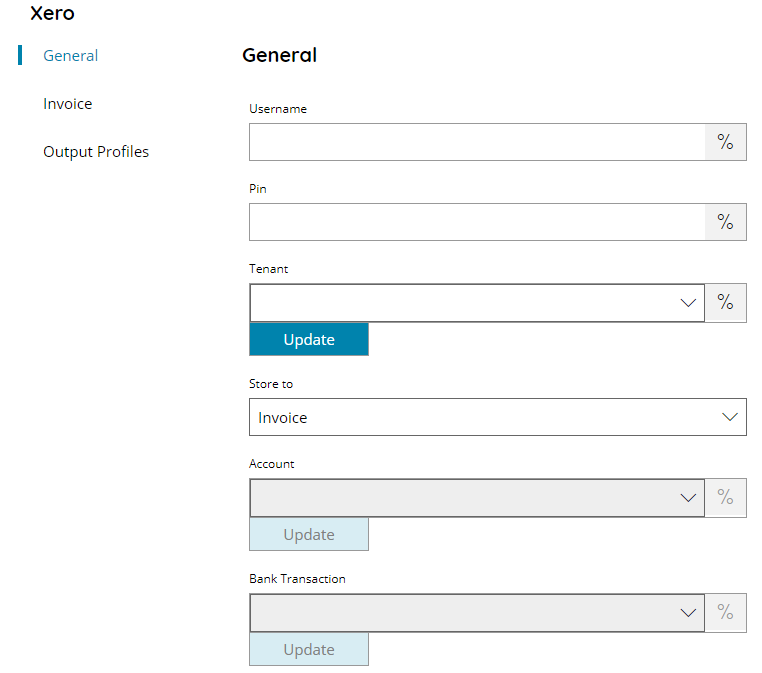
Username
Enter your Xero username here, or click on the Variables button on the right, to select a variable which will contain the username.
PIN
Enter your user PIN here, or click on the Variables button on the right, to select a variable which will contain the PIN. (PIN will be created in OAuth User settings).
Tenant
Browse and select the target tenant to which connect to or use the Variables button on the right to select a variable which will contain the target Tenant to use.
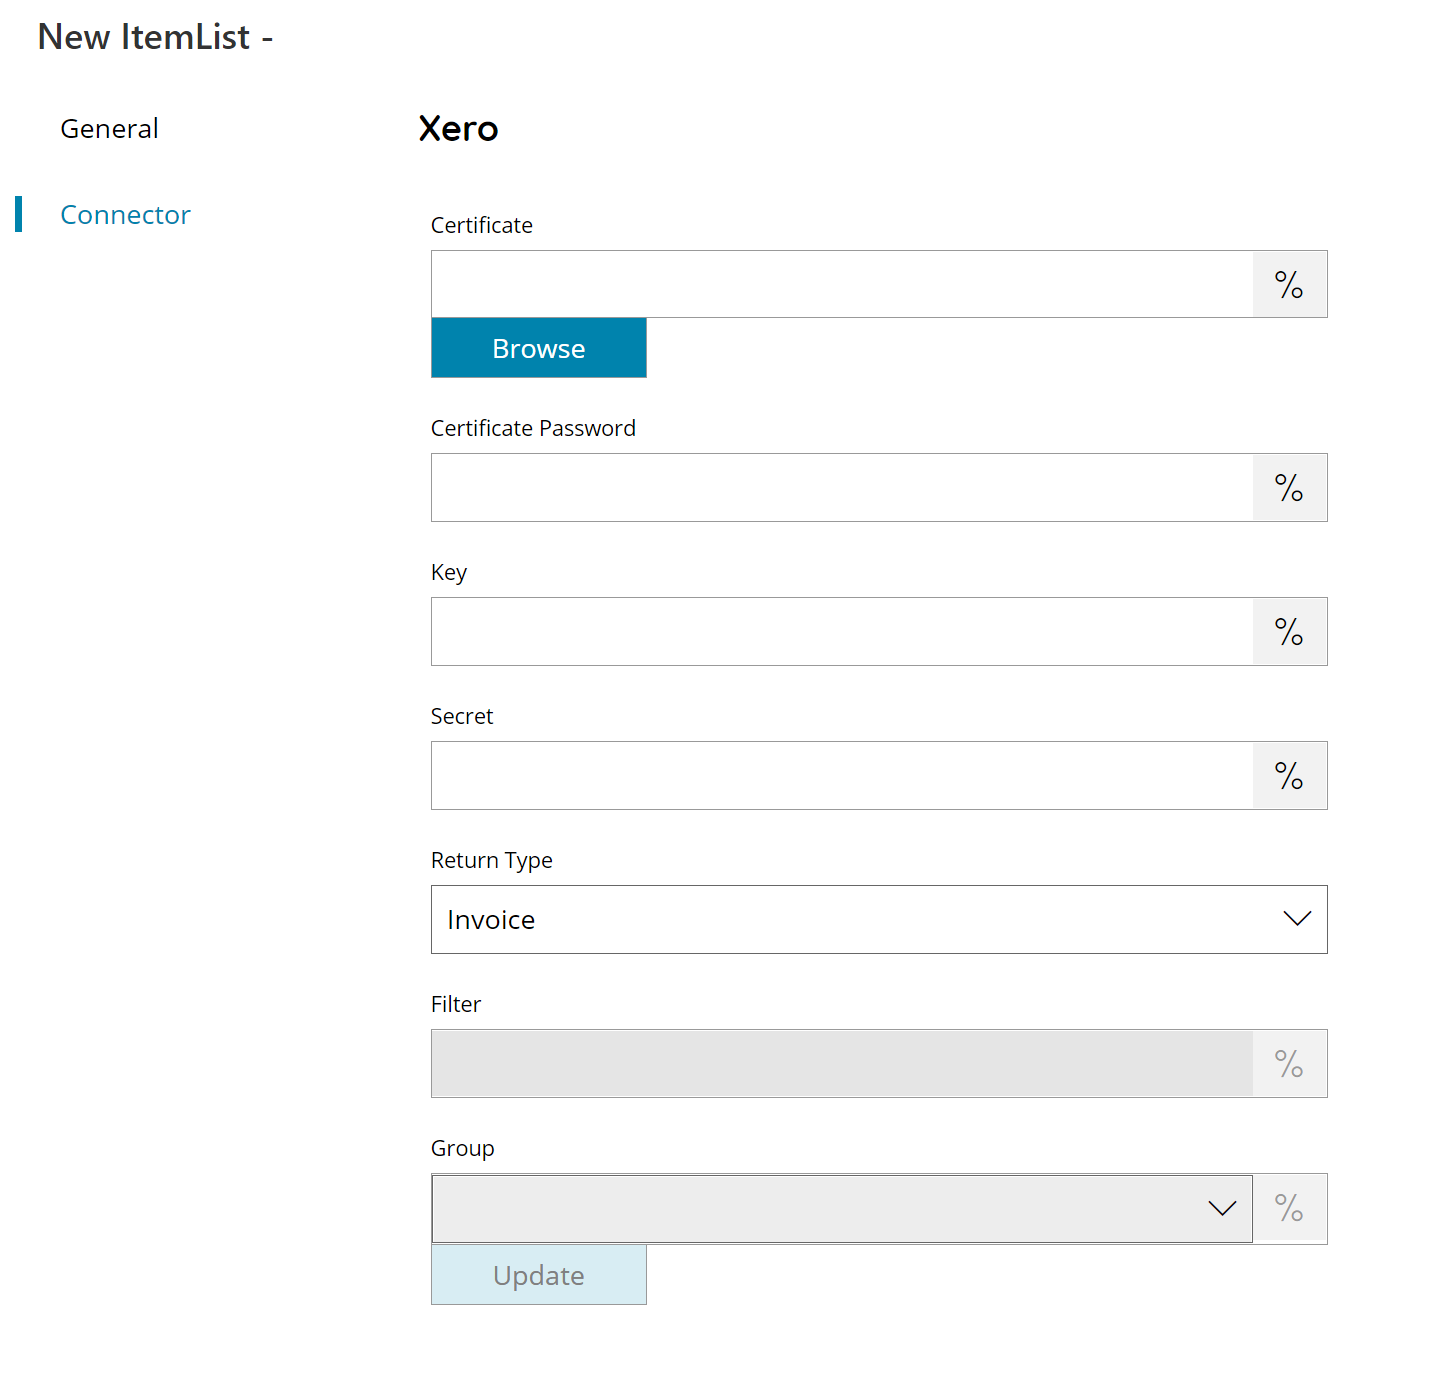
Return Type
Select the type of list you would like to return, this can either be:
- Accounts
- Bank Transactions
- Bank Transfers
- Contact
- Contact Group
- Credit Note
- Invoice
- Manual Journal
- Receipt
- Repeating invoice
Filter (only available with contact return type)
It sets a filter for contact search based on the contact name.
Group (only available with contact return type)
By selecting an item from the “group” list, you set up a search filter for group (It has priority greater than Filter).
Store
Username
Enter your Xero username here, or click on the Variables button on the right, to select a variable which will contain the username.
PIN
Enter your user PIN here, or click on the Variables button on the right, to select a variable which will contain the PIN. (PIN will be created in OAuth User settings).
Tenant
Browse and select the target tenant to which connect to or use the Variables button on the right to select a variable which will contain the target Tenant to use.
Store to
Select the location where you want to store your scanned documents. Possible options are:
- Account
- Bank Transaction
- Bank Transfer
- Contact
- Credit Note
- Invoice
- Manual Journal
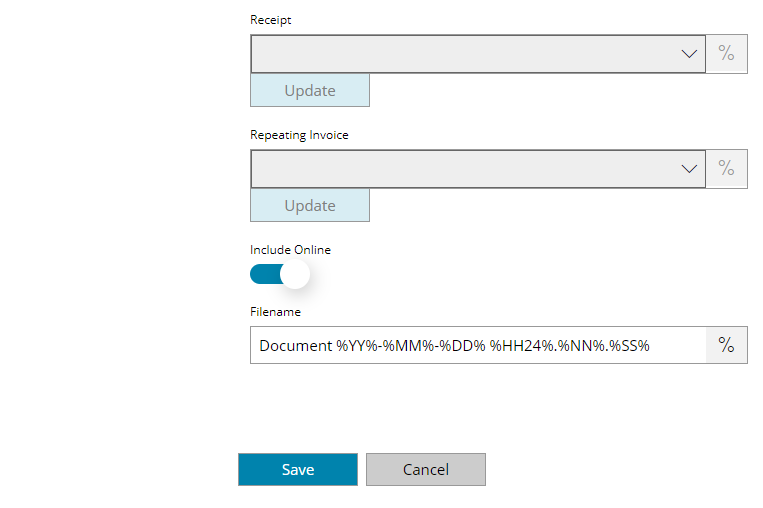
- Receipt
- Repeating Invoice
Depending on the selected location, a list of the selected location will be available and the target location can be selected in the appropriate list or a variable can be selected which will contain the target location.
Invoice provides a New checkbox in order to create a new invoice at the time of the storing rather than uploading to an existing invoice.
Include Online (only valid for invoice / credit note)
When enabled, the document will also be visible in the online invoice / credit note where it has been attached to.
Filename
Enter the filename for the document to upload, or click on the Variables button on the right, to select a variable which will contain the filename.
Invoice
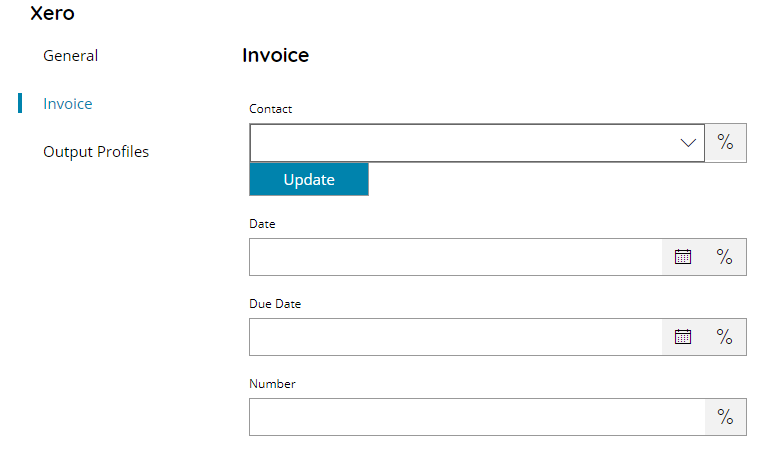
This section is visible only if New is selected in the Invoice list. Here settings to create a new invoice can be specified.
Contact
Enter or browse to the contact to which link to new created invoice, or click on the Variables button on the right, to select a variable which will contain the contact.
Date
Enter or pick up from the calendar the date of the invoice, or click on the Variables button on the right, to select a variable which will contain the invoice date.
Due Date
Enter or pick up from the calendar the due date of the invoice, or click on the Variables button on the right, to select a variable which will contain the invoice due date.
Number
Enter the number of the new created invoice, or click on the Variables button on the right, to select a variable which will contain the invoice number.