This is a OAuth connector, authentication requires creation and use of OAuth users.
Front
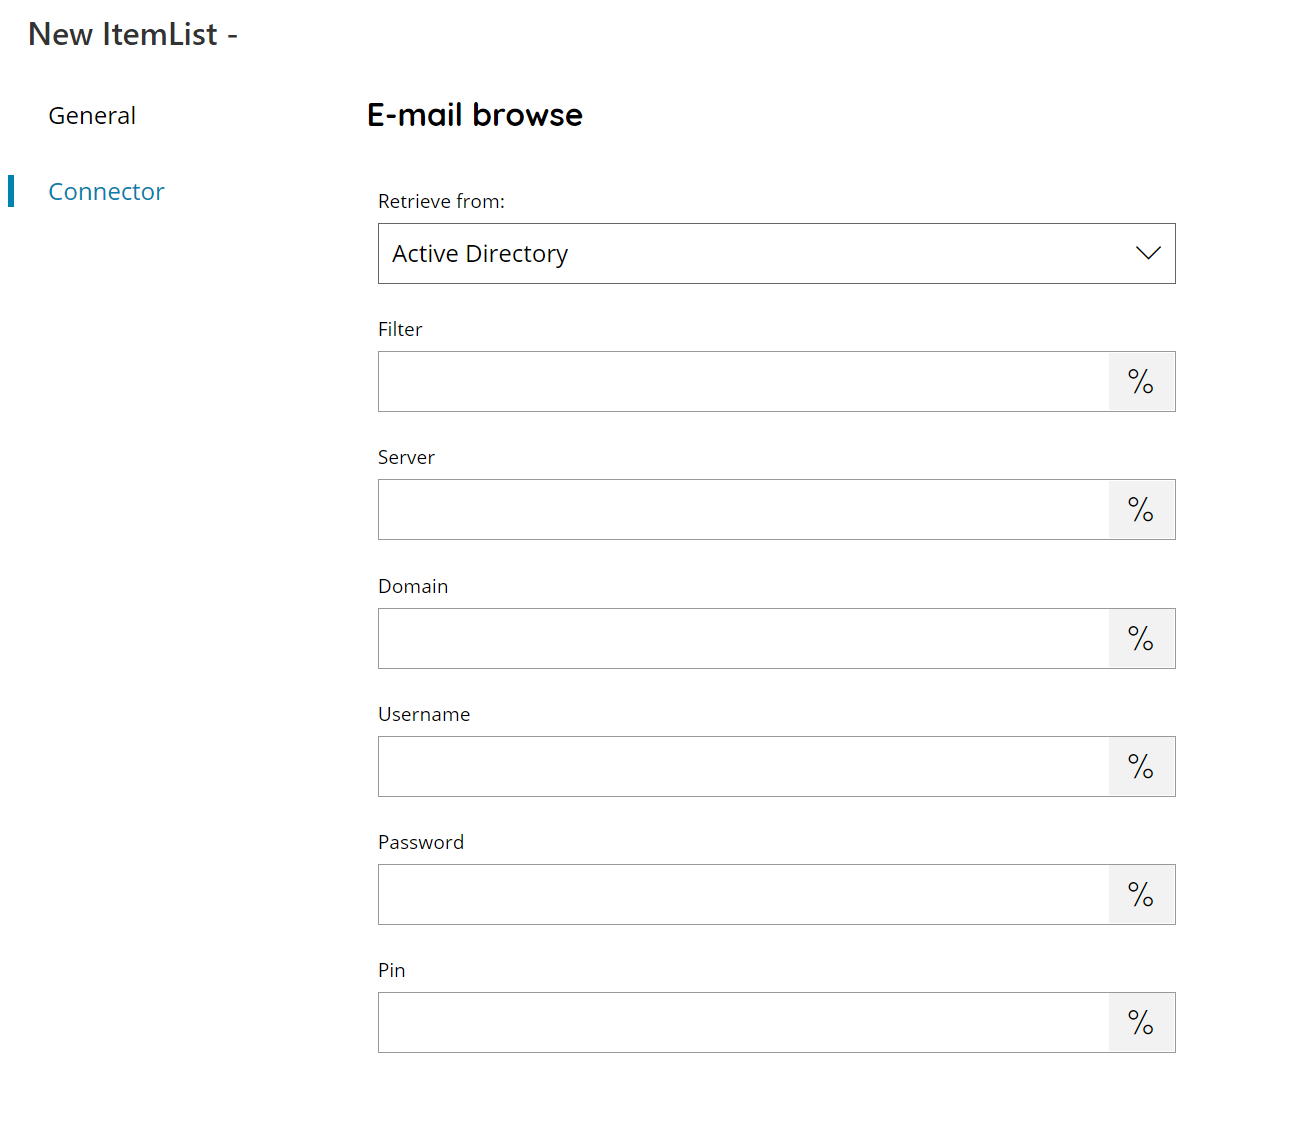
Retrieve from
Specify from where you want to retrieve email addresses. Available options are:
- Active Directory
- Exchange
- Office 365
When using Office 365 connection authentication requires OAuth.
Filter
Enter a keyword to use as a filter here, or click on the Variables button on the right, to select a variable which will contain the filter.
The filter is a free text filter, means you can type in anything which exists in the CN (for AD) or Display Name (for Exchange and Office 365). AD is performing a search in the AD tree, so can get any user present in the tree. Exchange / Office 365 is performing a search in the contacts of the provided mail box.
Server
Enter the mail server address where to get contacts from, or click on the Variables button on the right, to select a variable which will contain the server.
The field is not required when using Office 365.
Domain
Enter the domain for the authentication, if required, or click on the Variables button on the right, to select a variable which will contain the domain.
Domain will be used in combination of the provided username.
Username
Enter a valid username here or click on the Variables button on the right, to select a variable which will contain the username.
When using Office 365 this is the username used when creating the OAuth user and not the Office 365 username.
Password (not required for Office 365)
Enter a valid password here or click on the Variables button on the right, to select a variable which will contain the password.
PIN (required only for Office 365)
Enter your user PIN here, or click on the Variables button on the right, to select a variable which will contain the PIN. (PIN will be created in OAuth User settings)
Store
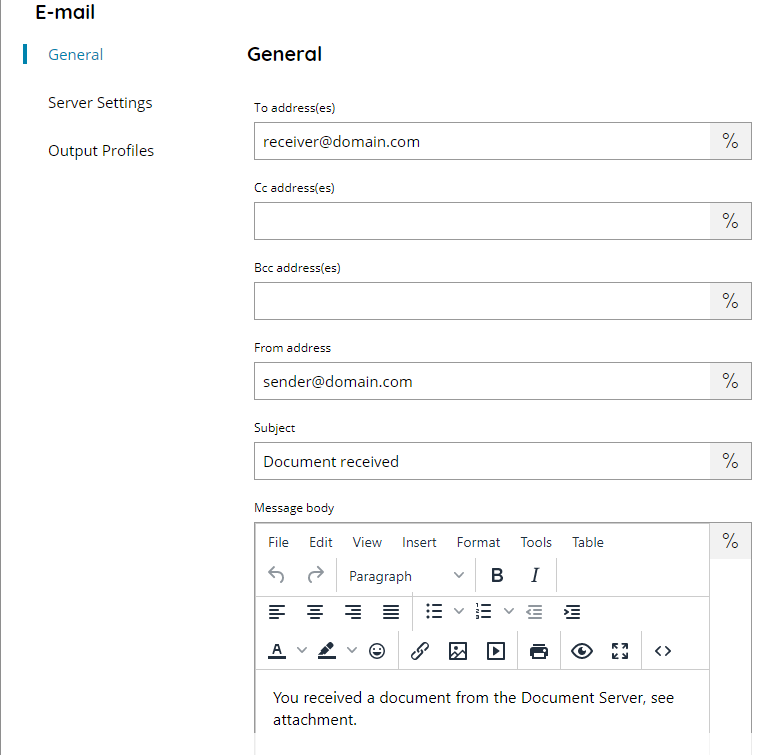
To address(es)
Enter the email address of the recipient(s), or click on the Variables button on the right, to select a variable which will contain the address of the recipient(s). Multiple addresses can be added, separated by a semicolon (e.g. mail@company.com; mail2@company.com; mail3@company.com)
CC address(es)
Enter the email address to put in copy of the mail, or click on the Variables button on the right, to select a variable which will contain the address of the recipient(s). Multiple addresses can be added, separated by a semicolon (e.g. mail@company.com; mail2@company.com; mail3@company.com)
BCC address(es)
Enter the email address to put in blind copy of the mail, or click on the Variables button on the right, to select a variable which will contain the address of the recipient(s). Multiple addresses can be added, separated by a semicolon (e.g. mail@company.com; mail2@company.com; mail3@company.com)
From address
Enter the email address of the sender of this email, or click on the Variables button on the right, to select a variable which will contain the address of the sender.
Make sure to use a from address which is allowed by the current mail server and logged in user otherwise a rely deny error might be generated.
Subject
Enter the subject for this email, or click on the Variables button on the right, to select a variable which will contain the subject.
Message Body
Enter the text for the body of this email, or click on the Variables button on the right, to select a variable which will contain the body text.
Full HTML body via the provided rich text editor can be used it as the Email will be encoded by default always in HTML. If you want to edit manually the body HTML don’t write HTML in the text editor but either use the specific Source code button.
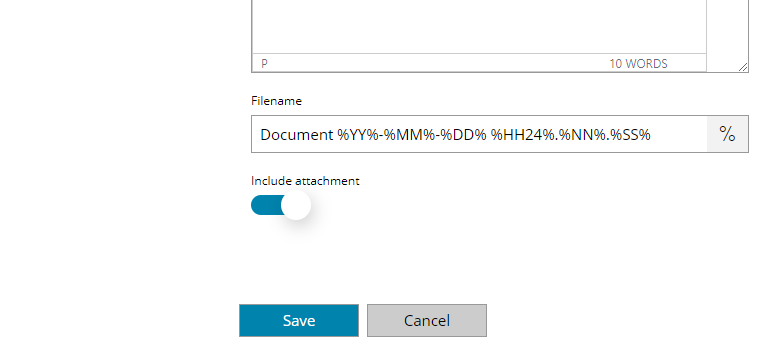
Filename
Enter the filename for the attachment to this email, which will be the scanned document, or click on the Variables button on the right, to select a variable which will contain the filename
Include attachment
Add the processed document as attachment to the generated mail or send only the message as composed. The document is included by default.
Server Settings

By default the server mail server settings are used to send this mail. However customized settings can be provided in this section which are used just by this connector instance.
Protocol
Specify which protocol to use to connect to the target provided server. Available options are:
- SMTP
- Exchange
- Office 365
Fields are changing based on the selected protocol. When using Office 365 connection authentication requires OAuth.
Server address
Enter the mail server address where to connect to, or click on the Variables button on the right, to select a variable which will contain the server.
Port
Enter the target mail server port where to contact to, or click on the Variables button on the right, to select a variable which will contain the port.
SSL
If enabled SSL will be used during connection. Make sure the specify the correct SSL port in the Port field above as normally a different port is used for SSL connections.
Explicit SSL
If enabled an Explicit SSL connection will be performed. This is used when the connection is established in clear and the client will request to start a TLS connection, e.g. STARTTLS commands.
Implicit SSL
If enabled an Implicit SSL connection will be performed. This is used when the client starts negotiating SSL before sending the EHLO/HELO command.
Explicit and Implicit SSL are exclusive to each other, make sure the select the correct settings. They might use different ports according the target mail server.
Tls 1.2
If enabled forces a SSL connection using the Tls 1.2 protocol version.
Domain
Enter the domain for the authentication, if required, or click on the Variables button on the right, to select a variable which will contain the domain.
Domain will be used in combination of the provided username.
Username
Enter a valid username here or click on the Variables button on the right, to select a variable which will contain the username.
When using Office 365 this is the username used when creating the OAuth user and not the Office 365 username.
Password (not required for Office 365)
Enter a valid password here or click on the Variables button on the right, to select a variable which will contain the password.
PIN (required only for Office 365)
Enter your user PIN here, or click on the Variables button on the right, to select a variable which will contain the PIN. (PIN will be created in OAuth User settings)
Keep sent mails (available only for Exchange and Office 365)
If enable retains a copy of the sent mail in the default Sent Items mailbox folder.
Test
If you select this button, Scanshare will try to establish a connection with the target mail server and authenticate with the provided credentials.