The multi tenancy option allows to run multiple instances of the Scanshare server configuration on a single unique installation, the instances are called tenants.
For tenant (instance) it is intended a complete Scanshare configuration, isolated and secured by each other, allowing to run different configurations for different customers in parallel on the same server.
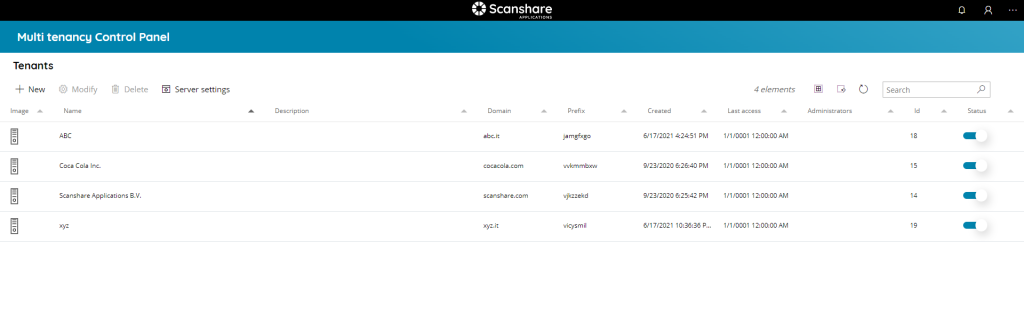
When the Multi Tenancy option is enabled the control panel will reload and switch to the multi tenancy view where the home is represented by the Multi Tenancy Control Panel. Now Scanshare is running in Multi Tenancy mode.
While running in Multi Tenancy mode some general server options are not available / restricted when logged in as single tenant administrators:
- License is not available
- Server Settings is limited only to tenant dependent settings: Mail, Cloud Print.
The Multi Tenancy operates in a Schema model where Scanshare uses the current database but creating a different schema for each tenant, each schema is identifies by a prefix assigned uniquely for each tenant.
When operating in Multi Tenancy mode Scanshare network services will accept only authentication with domain names, hence only new embedded clients are supported. Domain name depends on the selected domain while the Tenant is created, based on the domain the Scanshare services will establish the network session only with the database schema of the target tenant.
Processing services, instead, are separated for each tenant each one having its own dedicated processing service created at the time the tenant is created. Each processing service is locked only on the target tenant database schema assuring data isolation and safety and allowing parallel, independent, processing between all the tenants.
Each tenant will have access to its own data subfolders for each data type such as logs, document queues, uploads and so on. Every tenant internal reference is always distinguished by the tenant assigned prefix.
The main section shows you a list of all tenants currently configured.
It is also possible to search through the tenants by using the search function on the upper right side.
The view of the table is very easy and intuitive:
• Image
The type of Tenant identified by icon.
• Name
The name given to the Tenant.
• Description
The description of the Tenant.
• Domain
The domain given to the Tenant.
• Prefix
The DB table prefix assigned when the Tenant is created.
• Created
The creation date of the Tenant.
• Last access (for future access)
Last access date to the Tenant.
• Administrators (for future access)
List of the local administrators of the Tenant.
• Id
The id associated with your Tenant. It is unique and it is the id of your Tenant inside the DB.
• Status
If the Tenant is enabled or not. The status of a new created Tenant is automatically set to enabled. If the status is set to OFF the Tenant is not functional and any connection / login into that Tenant will not be accepted.
On the top of tenants list there are tenants controls.

• New
Create a new Tenant, opens the New Tenant dialog.
• Modify
Modify the selected Tenant, opens the New Tenant dialog.
• Delete
Delete the selected Tenant(s).
• Server settings
Access the full Scanshare Server Settings not tenant dependents. Here Multi Tenancy mode can be disabled reverting the standard Scanshare operational mode.
Always on Top Bar on the right hand side we can find general list controls.
• # elements
Number of the Tenants available in the list.
• Select all
Select all Tenants available in the list.
• Unselect all
Unselect all Tenants available in the list.
• Refresh
Refresh the Tenants list (reload tenants).
• Search
Filter the list by either information available for each tenant:
- name
- description