By pressing the ![]() button on the top of the screen, a new OAuth user can be created. The same dialog is displayed when editing existing OAuth users from the users list.
button on the top of the screen, a new OAuth user can be created. The same dialog is displayed when editing existing OAuth users from the users list.
OAuth users are special users which hold an OAuth access token released by the connected third party service in order to access the resources required to perform the specific task operation for which the token is requested.
The left hand side menu shows the available settings section. Settings are displayed according the selected section.
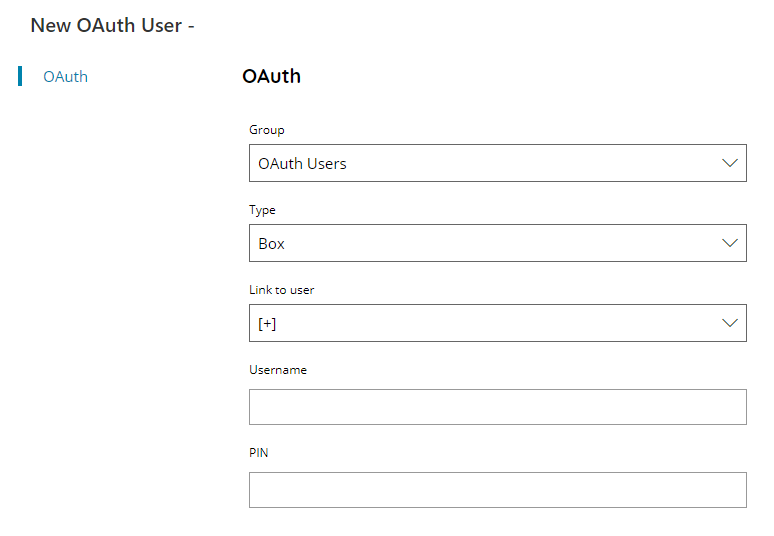
OAuth
Group
Select a group here where to insert the new created OAuth user.
Type
Select the type of OAuth user to add, the list shows all OAuth available connectors which require an OAuth user to access with.
Supported OAuth connectors are:
- Box
- Dropbox
- Dynamics365
- Email (Office365)
- Exact
- Google Drive
- iManage
- LEAP
- OneDrive
- OneDrive for Business
- PropertyMe
- Sage200
- Salesforce
- ShareFile
- Xero
- XPLAN
Link to user
Select an available Scanshare user to which this created OAuth user. Linking a user means save the requested OAuth Access Token inside the selected user and convert the existing user to an OAuth user without creating a new user.
Default option is the + value which will create a new separate user, if not already existing.
Username
Enter the OAuth username to assign to this user. The same username will be used inside the OAuth connectors in the username field.
PIN
Enter a PIN / password to protect the received OAuth Access Token. The same PIN will be used inside the OAuth connectors in the PIN field in combination of the previous entered username.
PIN / password can be anything (digits, characters and / or symbols) and it works as a password protected OAuth user.
Authorize
By clicking the Authorize button a popup dialog will be opened transferring the OAuth authorization flow to the selected third party provider (selected under the type field).
The popup will request the login into the selected third party provider and once successfully login will request the expected Scanshare permissions, if allowed the popup will automatically close and the new OAuth user will be successfully created.