Annotation allows creation and rendering of graphical artifacts (annotations) on the current document.
The configuration is done by selecting the target type of annotation between the available tools, drawing a zone where the target tool needs to be created and the module will render, and adapt, the output graphic in the selected area. Some tools might have additional specification configuration.
Graphical modifications are all rendered on the document and they cannot be removed anymore after the Annotation module processing has been executed.
The left hand side menu shows the available settings section. Settings are displayed according the selected section.
General
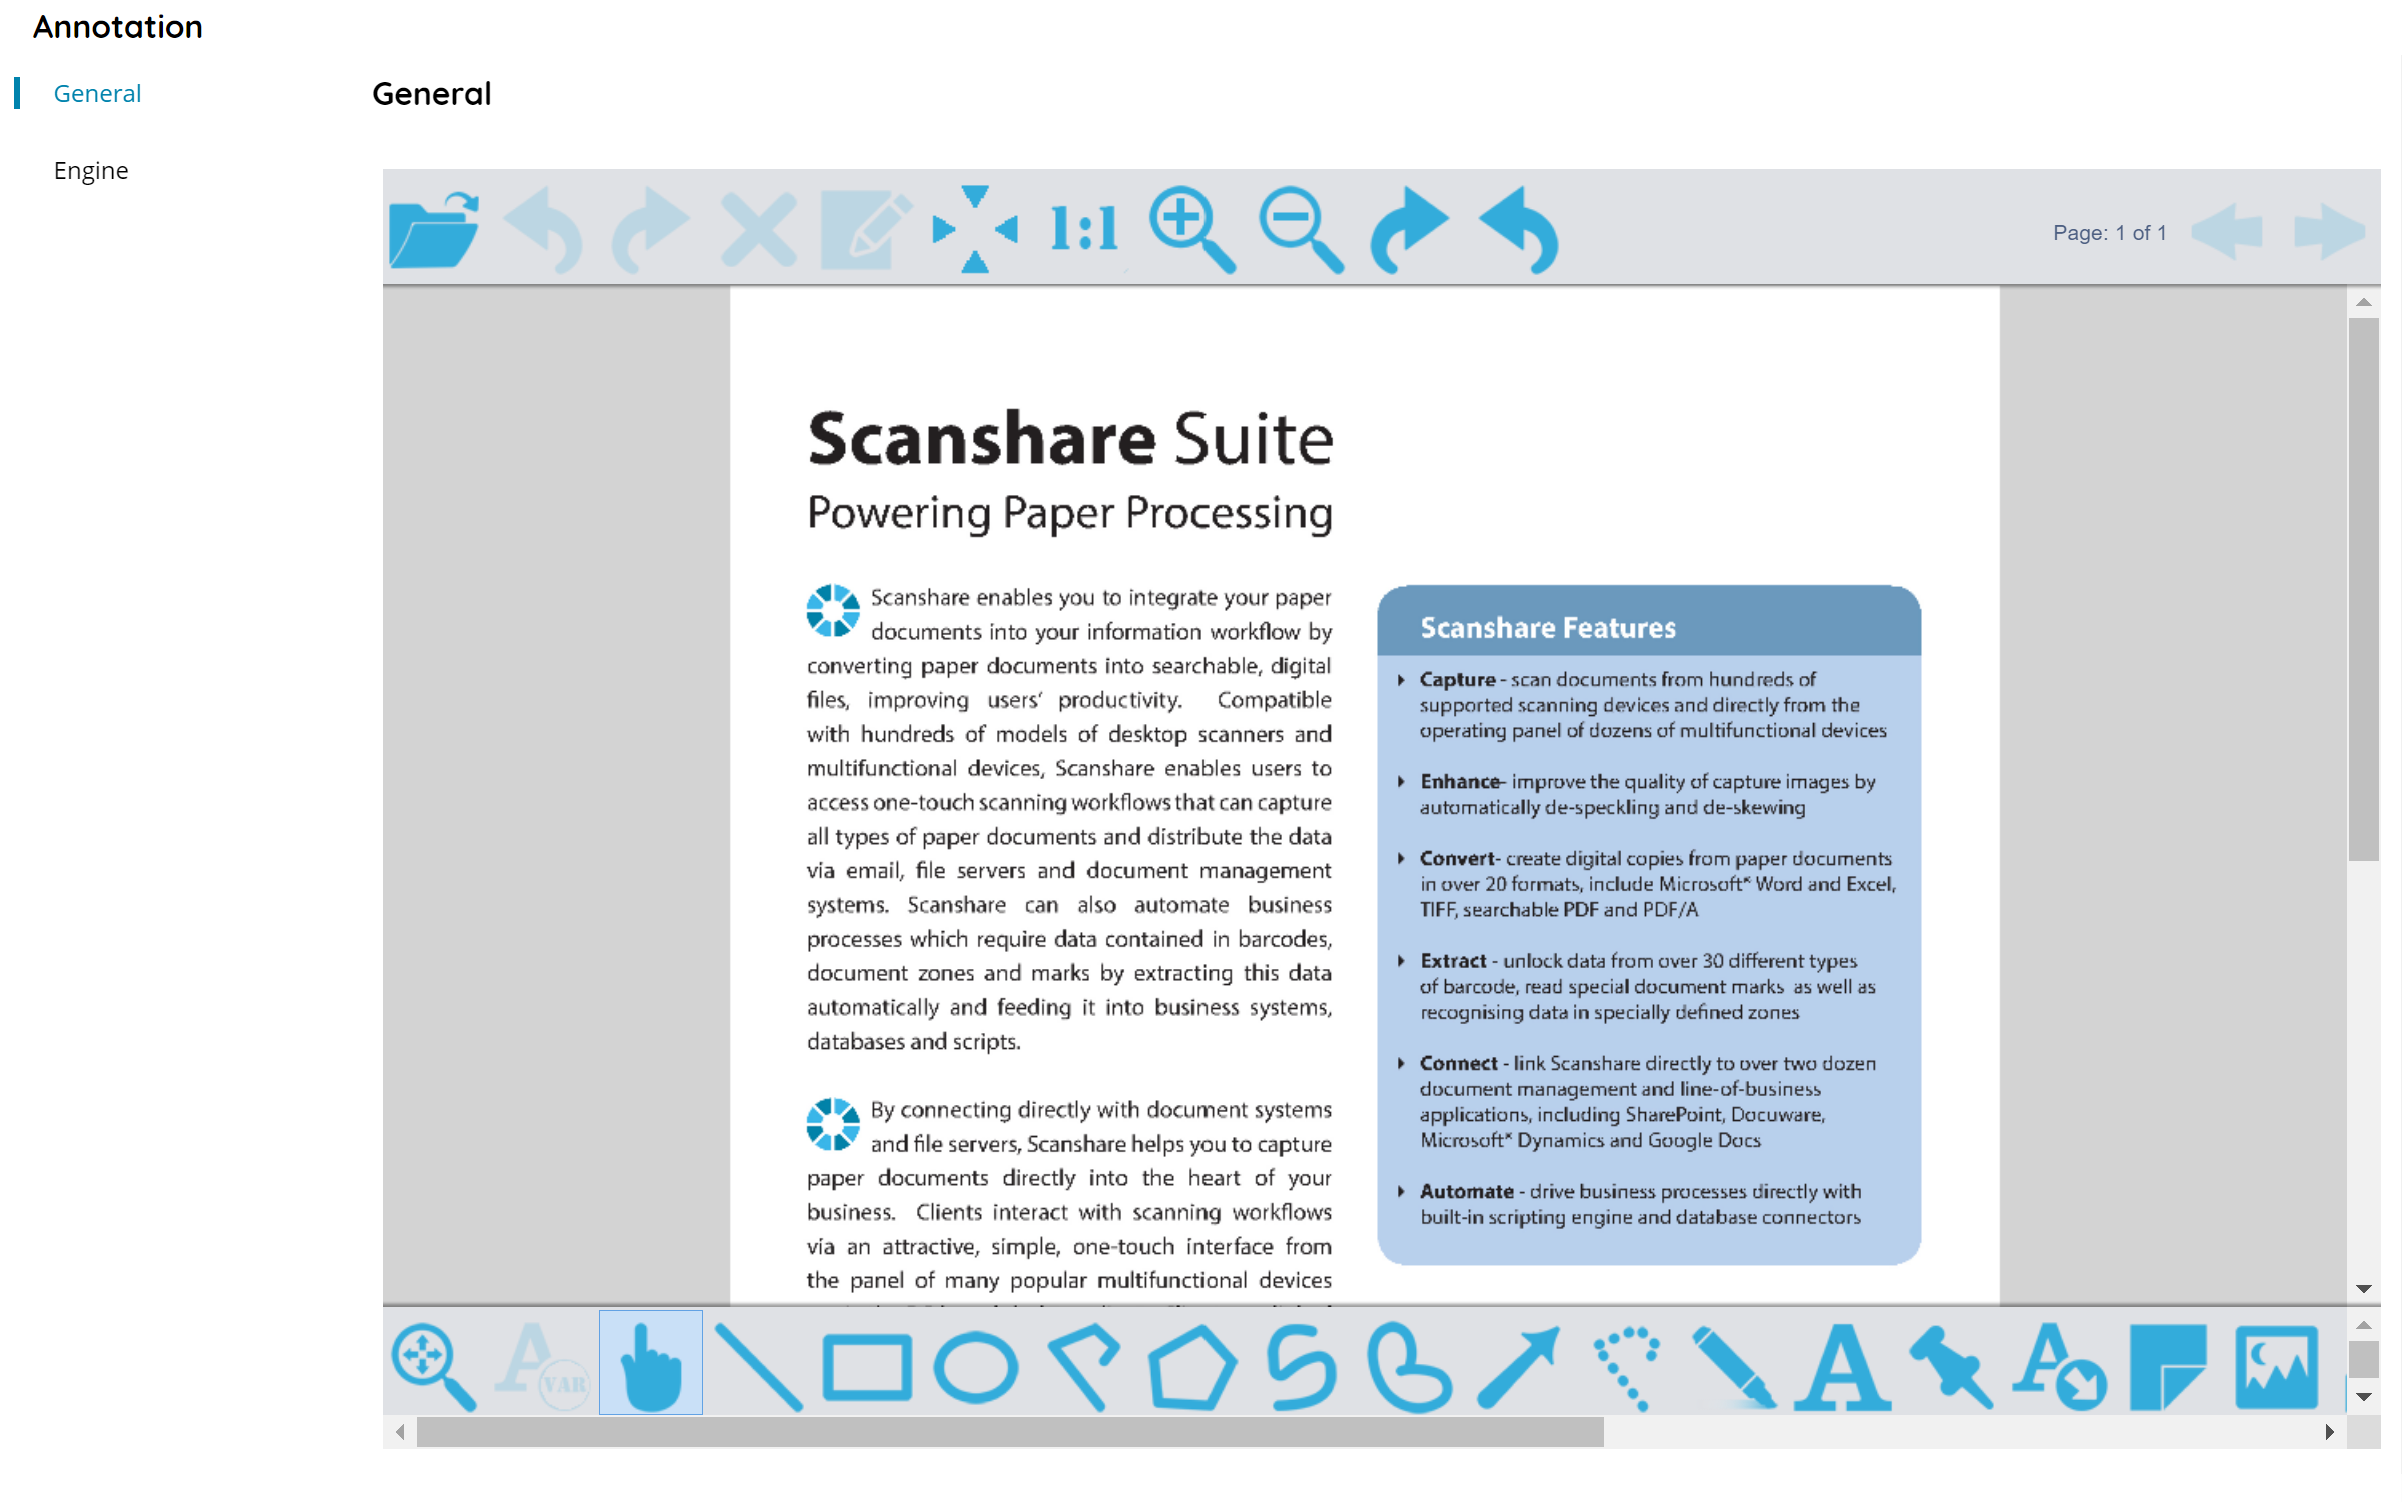
This section shows a sample built-in document preview, moreover it allows to load real document samples in order to draw and create the target annotations to generate.
On the top bar document controls are available:
• Load Image
Browse to open and load (by uploading to the server) a sample document to render on the preview pane.
The sample document will be saved inside the module settings and reopened the next time the module is configured by using the document file uploaded to the Scanshare data folder.
If the document file has been removed or the Workflow has been exported on a new machine where the sample document file is not existing the preview will render with a big red cross X, however zones are existing and fully working unless they are modified.
• Undo
Undo the latest operation done on the current view.
• Redo
Redo the latest operation done on the current view.
• Delete the selected object
Delete the current selected annotation object.
Objects can be deleted also with the DEL keyboard key, once selected.
• Properties selected object
Shows the properties dialog of the selected annotation object, if any. The dialog allows to customize further settings of the specific selected annotation object.
Properties dialog can be displayed also with the RIGHT click of the mouse on the object, once selected.
• Fit
Fit the document to the current view.
• One to One
Enlarge the document to the 100% zoom ratio into the current view.
• Zoom In
Zoom In the document into the current view.
• Zoom Out
Zoom out the document into the current view.
• Rotate Clockwise
Rotate clockwise direction the document by a manner of 45 degrees.
• Rotate Counter Clockwise
Rotate counter clockwise direction the document by a manner of the 45 degrees.
• Page
Displays the current preview page number on the total number of pages of the document.
• Previous page / Next page
Load and display the previous or next page preview of the document.
Annotation toolbar
On the bottom bar annotation object controls are available. The controls are helpful to select the current annotation object and draw it on the document preview.
• Pan/Zoom
When selected it will change the default cursor mode in Pan/Zoom and allows to pan and/or zoom the document preview by mouse. It is exclusive selection between the Select tool.
• Insert variable
It opens the variables dialog and allows to select a variable to insert in the current selected annotation. The button is enabled only when the current selected annotation is text based and allows to enter any text, hence variables as well.
• Select
It is the default cursor operation mode, allows to select annotation objects in the document area. It is exclusive selection between the Pan/Zoom tool.
Annotation objects
Select the desired annotation object and draw the object in the desired area on the document preview. The target annotation object will render exactly as it appears and in the position it appears. Make sure to use a production sample to avoid to misplace the final position if using different documents which may differ in size and resolution.
Engine
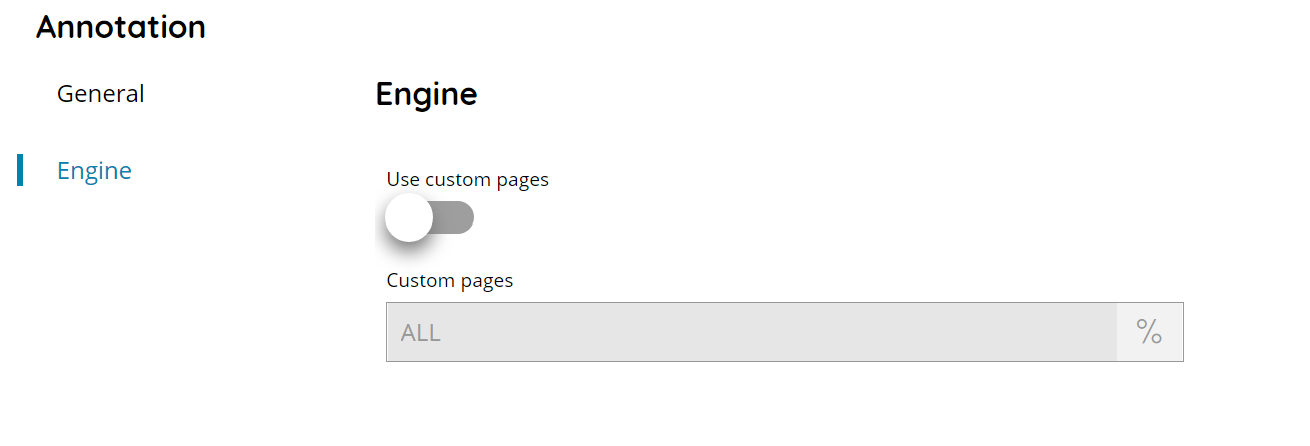
Use custom pages
If enabled allows to specify on which pages the current configured annotation objects need to be created.
Custom pages
Enter here an expression to select the custom pages on which the annotation objects need to be created, or click on the Variables button on the right, to select a variable which will contain the target value.
The format of the string is a (,) comma separated string of page indexes such as:
1,3,5,7,15
To apply the same annotation objects configuration on all pages the text ALL can be used inside this field.
The option is valid when Use custom pages is enabled.