After a successful installation of Scanshare, and successful activation, you are ready to proceed with the next step.
The first time you start the application, user specific settings can be changed and workflows can be designed. Starting from the Dashboard you can easily jump to the desired location.
You will see the following screen at start up:
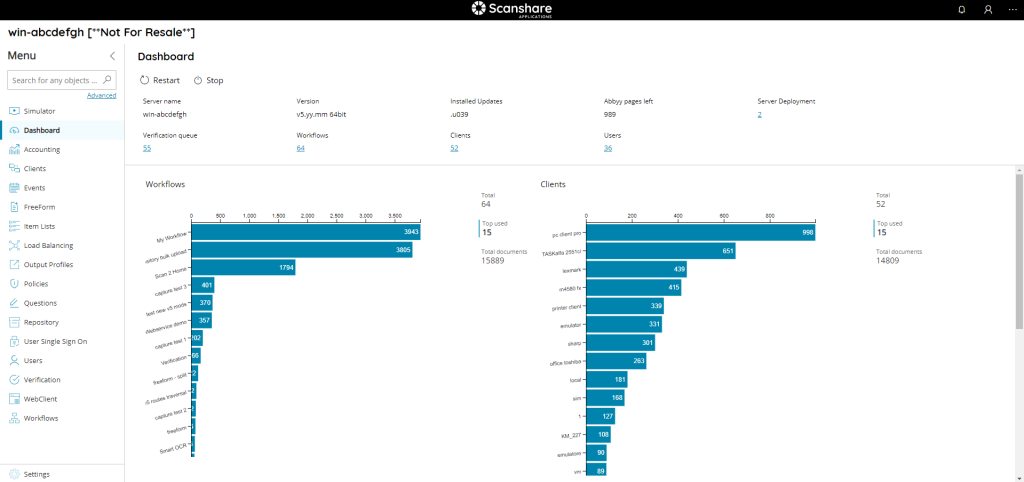
Dashboard
You can see various sections and information such as:

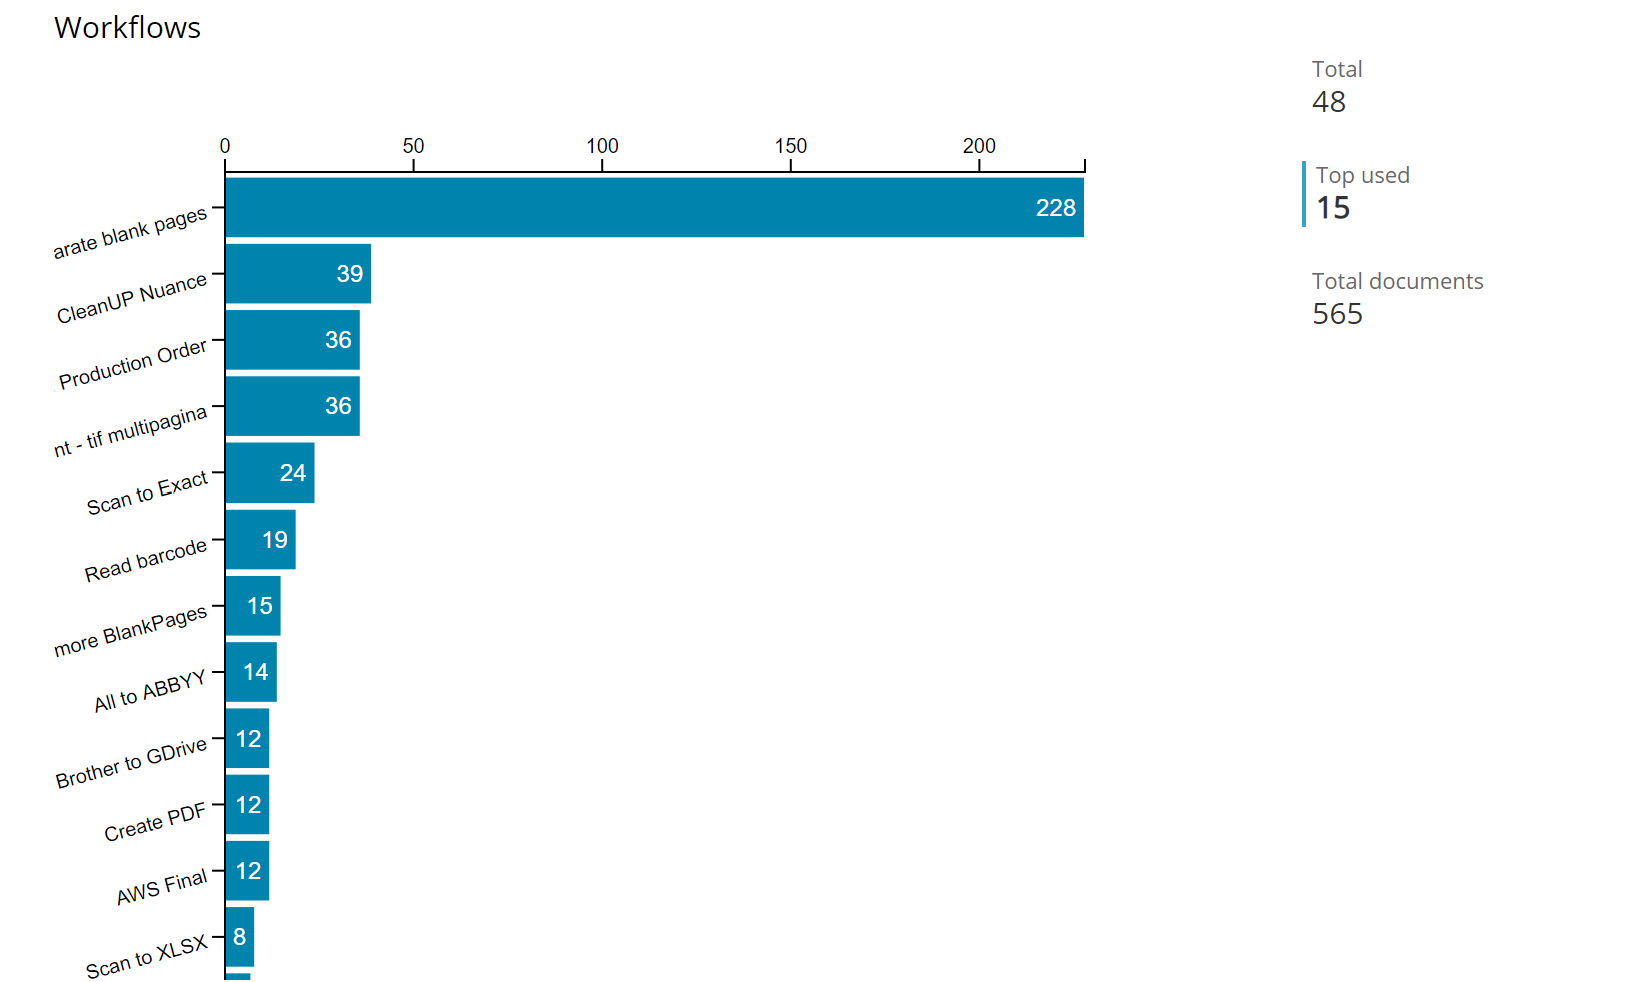
Workflows:
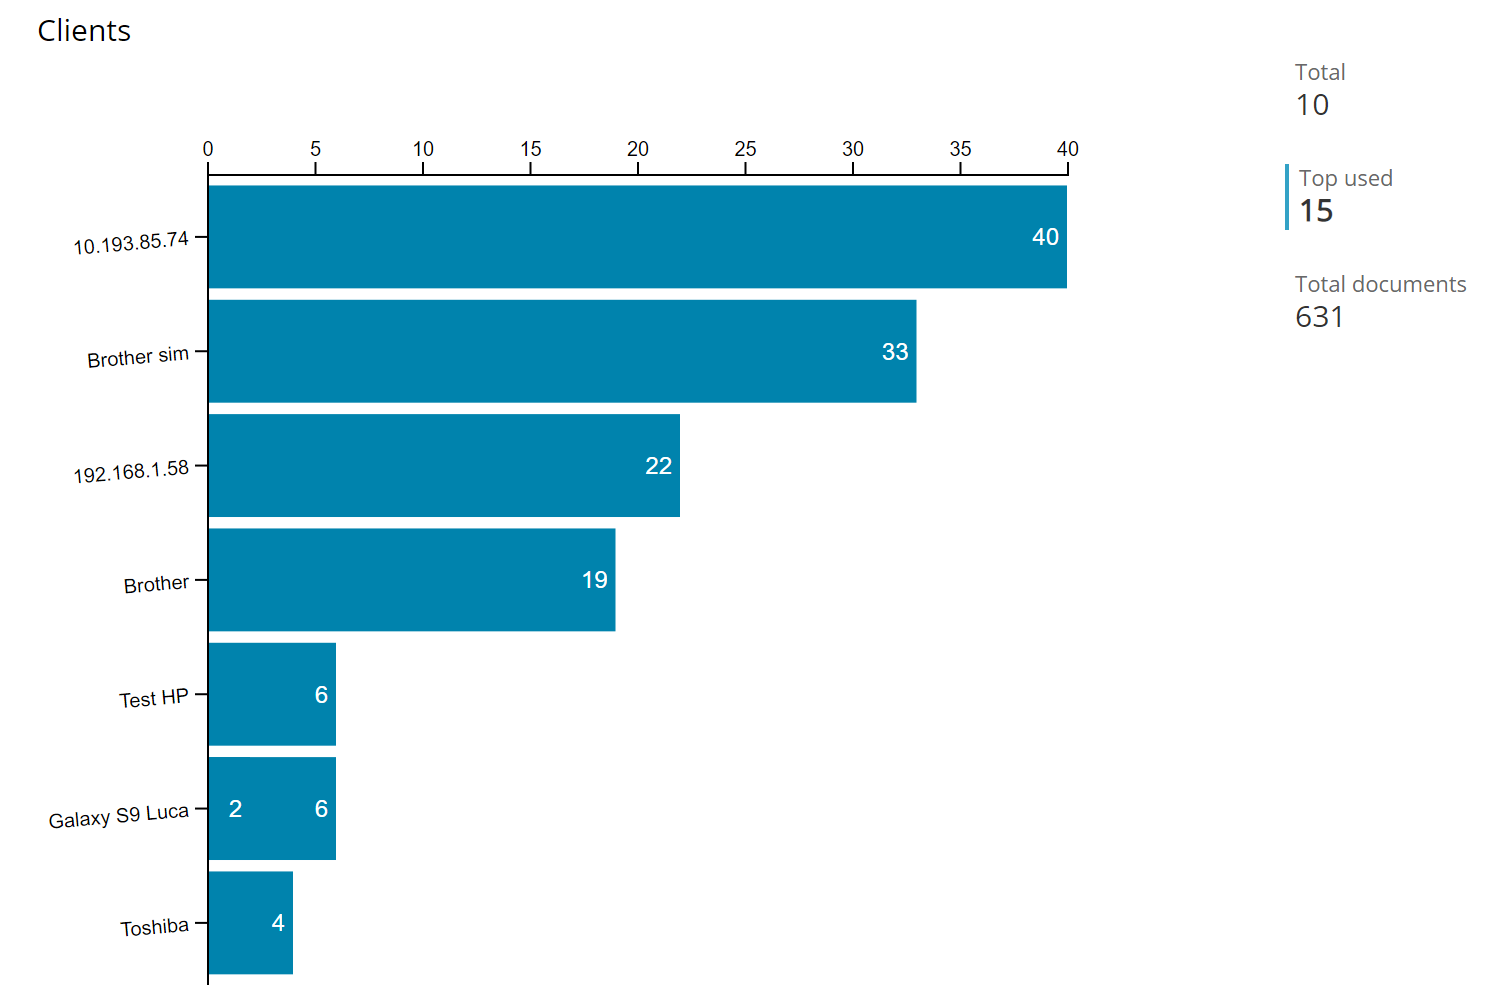
Clients:
Users:

Top Bar
In the main bar on the right we will find the different menu’s will be selectable.

• Notification
This menu gives the possibility to keep under control all the application states by containing notifications.
• User Account
It contains information on the logged user.
• About (hamburger menu)
Some main methods of checking license, more details for support, Help and general info.
About
By pressing the last bar icon, the about menu will appear
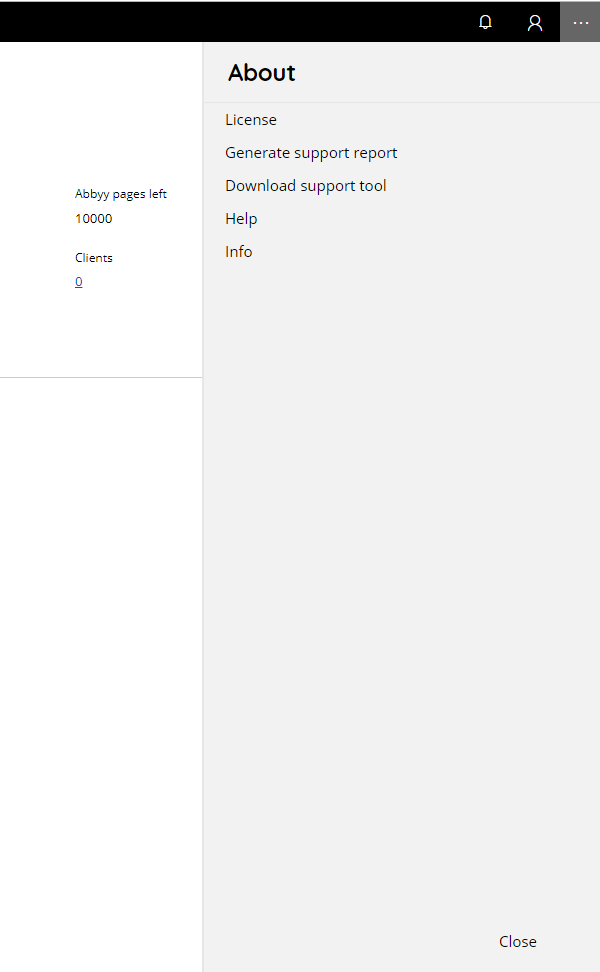
• License
License information will be displayed here
• Generate support report
Press the generate support report text to export all app data (logs, settings and workflow) configured.
• Download support tool
Press to download the support client tool in order to have a support team engineer remotely connect to your computer for assistance
• Help
Pressing this button will open the in built Manual
• Info
Here all modules and connectors included in your license will be shown (please refer to Info menu for detailed information). Here it is also possible to check if your application is up to date
Notifications
Application notification center, all notifications of success and even those with errors will be present here with info of the server name that generated it and with the specific date.
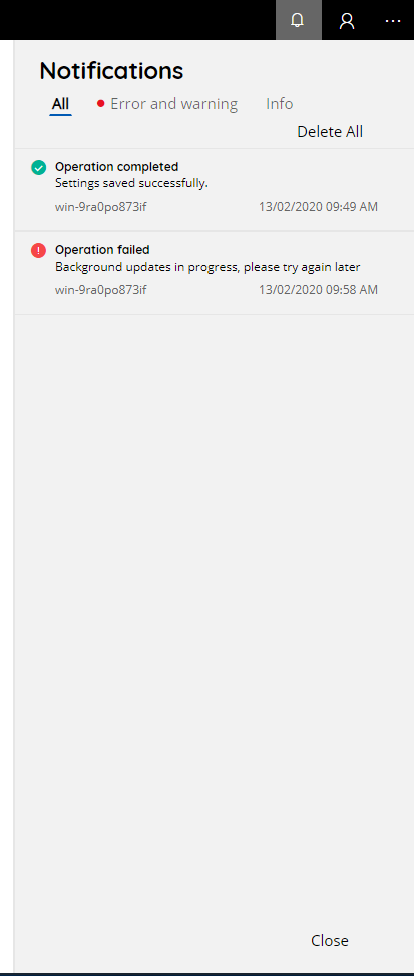
• All
here you will find all notifications divided by success and failure icon in order of arrival. Notifications have a small description in the preview.
• Error and warning
Similar to the previous one but only with errors and warnings levels
• Info
Similar to the previous but only with Info level
Click on each single notification to expand the message text if not fitting into the notification default message section.
You have the option to delete all notifications or otherwise you will see them disappearing after logging out.
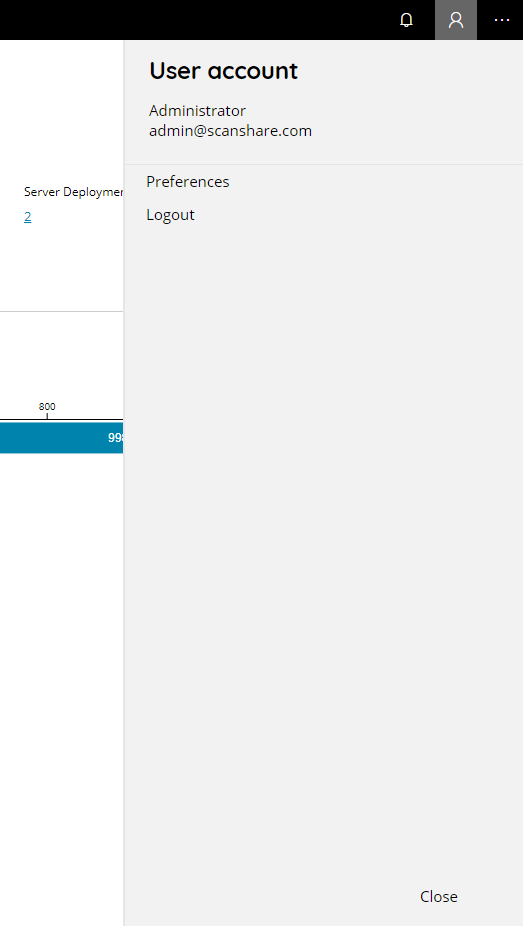
User account
Here you will have the possibility to see the logged in user, to logout and to customize User Preferences.
Main Menu
The menu contains varius sections:
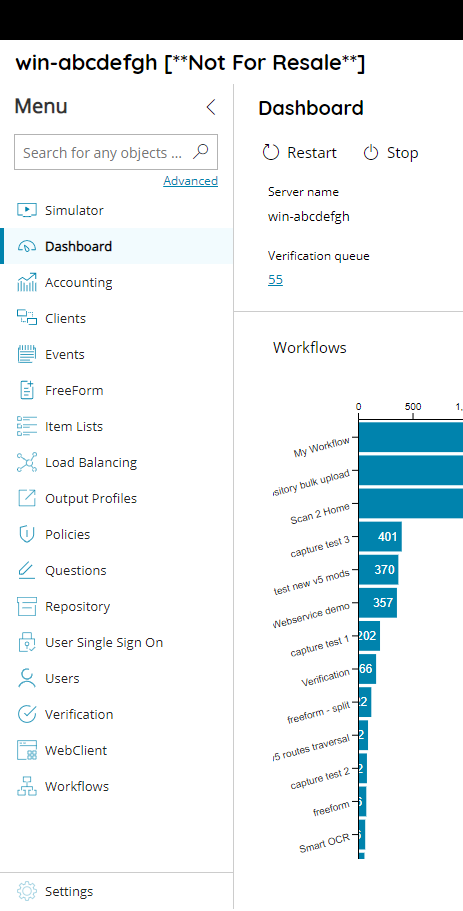
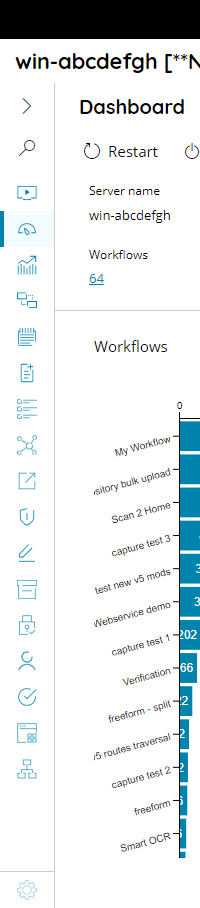
You can also try to close the side menu for a greater view of the main view by clicking on the arrow:
• Dashboard
The dashboard shows you a clear overview of all parts of the Scanshare server (for a detailed description go to the Dashboard menu)
• Accounting
Here you can create clusters to devide the processing over one or more servers (for a detailed description go to the Load balancing menu).
• Clients
An overview of all configured clients is shown here. in this menu you can also add, delete or modify clients (for a detailed description go to the Clients menu)
• Events
Livestream of the application services logging to monitor application working behavior (for a detailed description go to the Events menu)
• Free Form
Here you can create Free Form templates (for a detailed description go to the Free Form menu).
• Item Lists
Here you can create Free Form templates (for a detailed description go to the Item list menu).
• Load balancing
Here you can create clusters to devide the processing over one or more servers (for a detailed description go to the Load balancing menu).
• Output Profiles
Here you can create Free Form templates (for a detailed description go to the Output Profiles menu).
• Policies
Here you can create Free Form templates (for a detailed description go to the Policies menu).
• Questions
Here you can create Free Form templates (for a detailed description go to the Questions menu).
• Repository
Here you can create, delete or modify your repository (for a detailed description go to the Repository menu)
• User Single Sign On
Here you can create, delete or modify your repository (for a detailed description go to the User Single Sign On menu)
• Users
All User groups will be shown here, allowing you to create, delete or modify user groups and users (for a detailed description go to the Users menu)
• Verification
Here you can create, delete or modify your verification process (for a detailed description go to the Verification menu)
• WebClient
Start the WebClient establishing a connection with the logged in user and loading the current available workflows (for a detailed description go to the WebClient menu)
• Workflows
Here you can create, delete or modify your workflows (for a detailed description go to the Workflows menu)
• Settings
Here you can create, delete or modify your verification process (for a detailed description go to the Settings menu)
Search
• Search
On top of the menu a global search field is available.
By entering text here, you can search through the complete application for any match with the entered keyword. Search is searching any Scanshare object matching the entered keyword such as Clients, Users, Workflows, Output Profiles, Questions, Profiles, Repository Folders and Files and so on.
For each returned matching object a direct modification button is displayed.
• Advanced
Advanced search is available to filter and customize search parameters.
You can choose either from: