This is a Client capture module, adding this module will allow the Workflow to be visible into the connected clients of this type. The module itself doesn’t capture any document but it will look into the client incoming queue for documents to process.
Capture module Brother Client allows to use this Workflow on connected and enabled Brother embedded Clients. When this module is added to a Workflow this will be visible, according eventually any permissions, to the Brother Clients currently configured in the Clients section.
Brother will allow to scan documents from Brother devices equipped with BSI technologies via the installed Scanshare embedded client.
For each imported job the Brother module will create a document into the target Workflow incoming queue. The document is composed by two files:
- .img: the document itself in TIF LZW format retaining the original scanned document and properties
- .var: the variables automatically generated for the job and user inserted via Questions in a strong encrypted AES format
The default Incoming queue is located inside C:\ProgramData\Scanshare\Incoming\Workflow-ID.
The variable file is specifically linked to the Workflow for which it has been created for security reasons. If moved into a different Workflow it will not be parsed and generate a Bad Data error at the start of processing.
The left hand side menu shows the available settings sections. Settings are displayed according the selected section.
Scan
This section allows to customize the scanning settings used by this workflow when the scan job is started on any connected Brother device.
Scan settings customization allows to set the default option for every supported scan option, if the default option can be changed by the end user and which options the user is available to choose from when the default option can be changed.
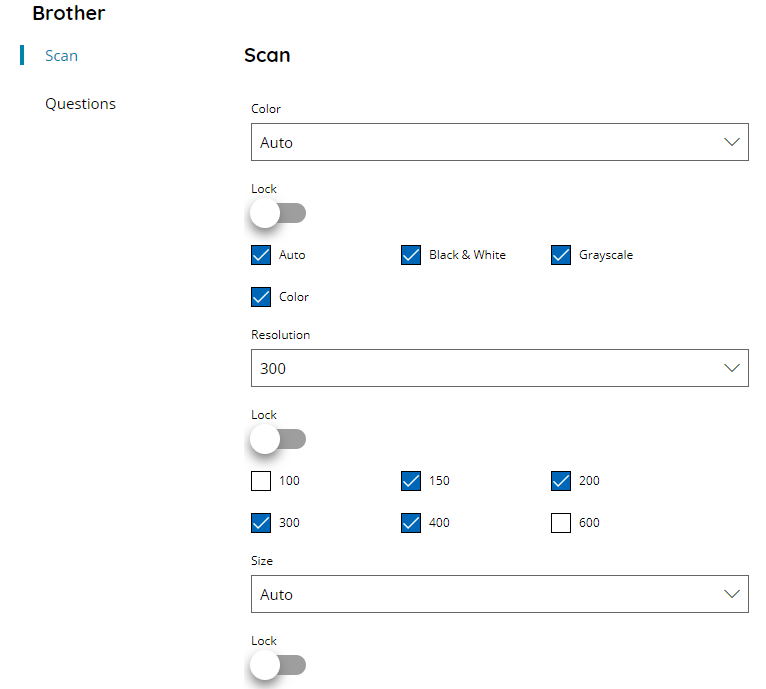
Color
Select the default Color setting to set and use when scan job is started. Available options are:
- Auto
- Black & White
- Grayscale
- Color
Resolution
Select the default document Resolution to set and use when scan job is started. Available options are:
- 100
- 150
- 200
- 300
- 400
- 600
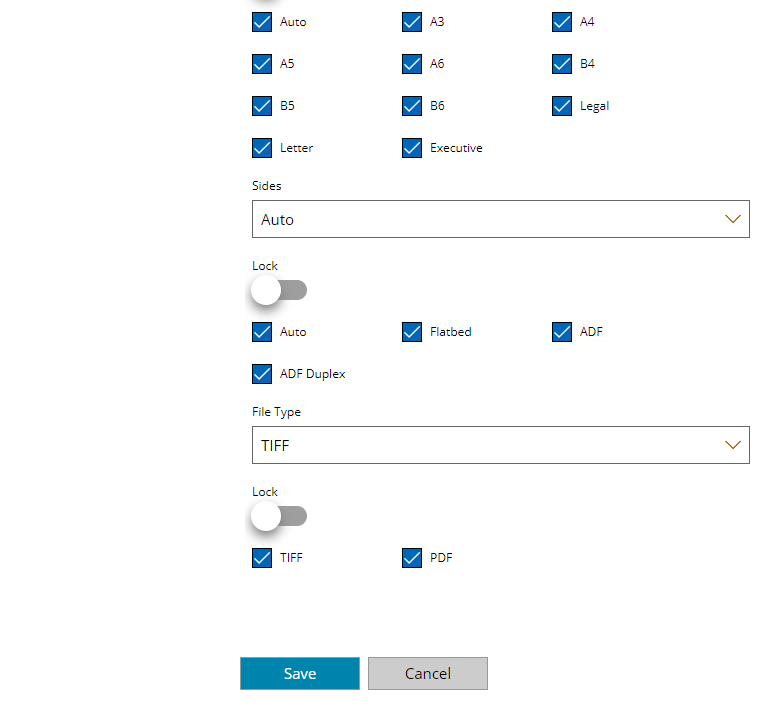
Size
Select the default document paper Size to set and use when scan job is started. Available options are:
- Auto
- A3
- A4
- A5
- A6
- B4
- B5
- B6
- Legal
- Letter
- Executive
Sides
Select the default Duplex mode to set and use when scan job is started. Available options are:
- Auto
- Flatbed
- ADF
- ADF Duplex
File Type
Select the default document File Type to produce when the scan job is terminated. The scan job produced in this format will be sent to the server for the current Workflow. Available options are:
- TIFF
File Type is the document file which will be available in the current Workflow incoming queue as .img file. This doesn’t necessarly indicates the Workflow output format because document is processed and stored according the selected connector Output Profile. To retain this exact document refer to the Skip Processing option(s).
Lock & Checkboxes
For each scan setting if Lock is enabled the default selected options above will be locked on the connected devices and the parameter cannot be changed. Otherwise the user can change the default option before scanning by choosing one of the available scan options above according the selected checkboxes. When the options are unselected they will not be available as possible selection for the user.
Questions
This section shows the list of available Questions in this server. From here new questions can be created and existing questions can be modified, however existing questions cannot be deleted and they need to be deleted from the general Questions list.
Select one or more questions, with the checkbox in the first column of the table, to be used and displayed for this Workflow on the connected clients.
The Questions section here is used in the same way in all clients capture modules. For more information check the Capture Questions section.